Remote-Controlled Date Clock & Message Board for Elderly Relative
[Discussed on Hackaday]
Contents
- Introduction
- Design Specifications
- The Result
- Operation
- Device Hardware
- Development Hardware
- Networking
- System Setup
- Software
- Possible Future Improvements
- Conclusion
Introduction
An elderly relative has been having trouble with times, dates, and schedules. I looked into technology that might help.
There are commercial products that try to address the problem. Amazon lists a few products like this:

They cost about $45 or so. Labels are big, clear, and do not use abbreviations. Redundant information like "Morning" and "Afternoon" can help reduce confusion. The screen automatically dims at night.
None of them, however, automatically update for daylight savings time. That made them completely useless for my purposes, since I live on the other side of the country. There's no way someone with technology difficulties is going to do well with a UI like this (located on the back of the screen):

Note that you can't even operate the buttons and look at the screen at the same time. I don't expect the staff at the assisted-living facility there to have to read a manual twice a year in order to adjust the clock.
Since WiFi is available on site, I thought I could put together something better using a small monitor and a Raspberry Pi Zero.
Design Specifications
Include the features of the commercial date clocks:
- 12-hour time with hours, minutes, and "am" or "pm."
- Label for time of day (e.g., "Morning", "Evening").
- Day of week.
- Full unabbreviated date.
- Dim screen at night.
In addition, add an area for custom messages to appear on a scheduled or one-time basis:
- Up to 3 messages.
- Specify time of day the message is to be shown.
- Specify day of week, repeating day of year, one-time date, or date range.
Also:
- Automatically change for local daylight savings time.
- Synchronize time via NTP.
- Allow for adjustable time of day to dim screen.
- After power fail or reboot, clock must restart automatically.
And allow full remote access and modification:
- Establish ssh connection to clock from computer or mobile device as needed.
- Connections must work behind NAT at either end.
- Remotely change and schedule messages.
- Install full development environment to allow for modifying source code remotely.
I assumed I would have to be on site in person to set it up initially, but after that I hoped it would keep going without any hands-on intervention on my part.
The Result
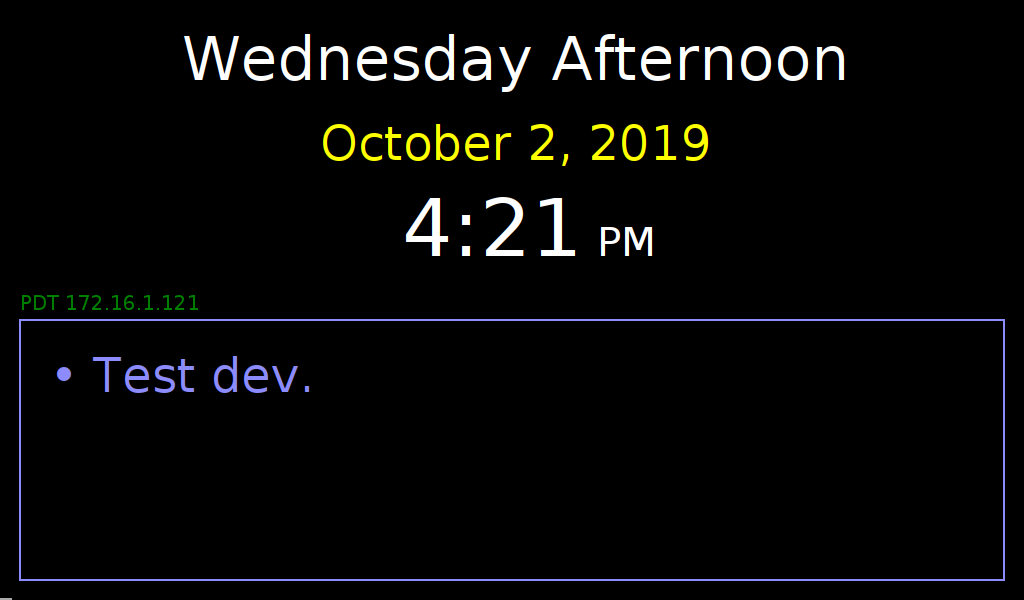
Here is the finished device in operation:
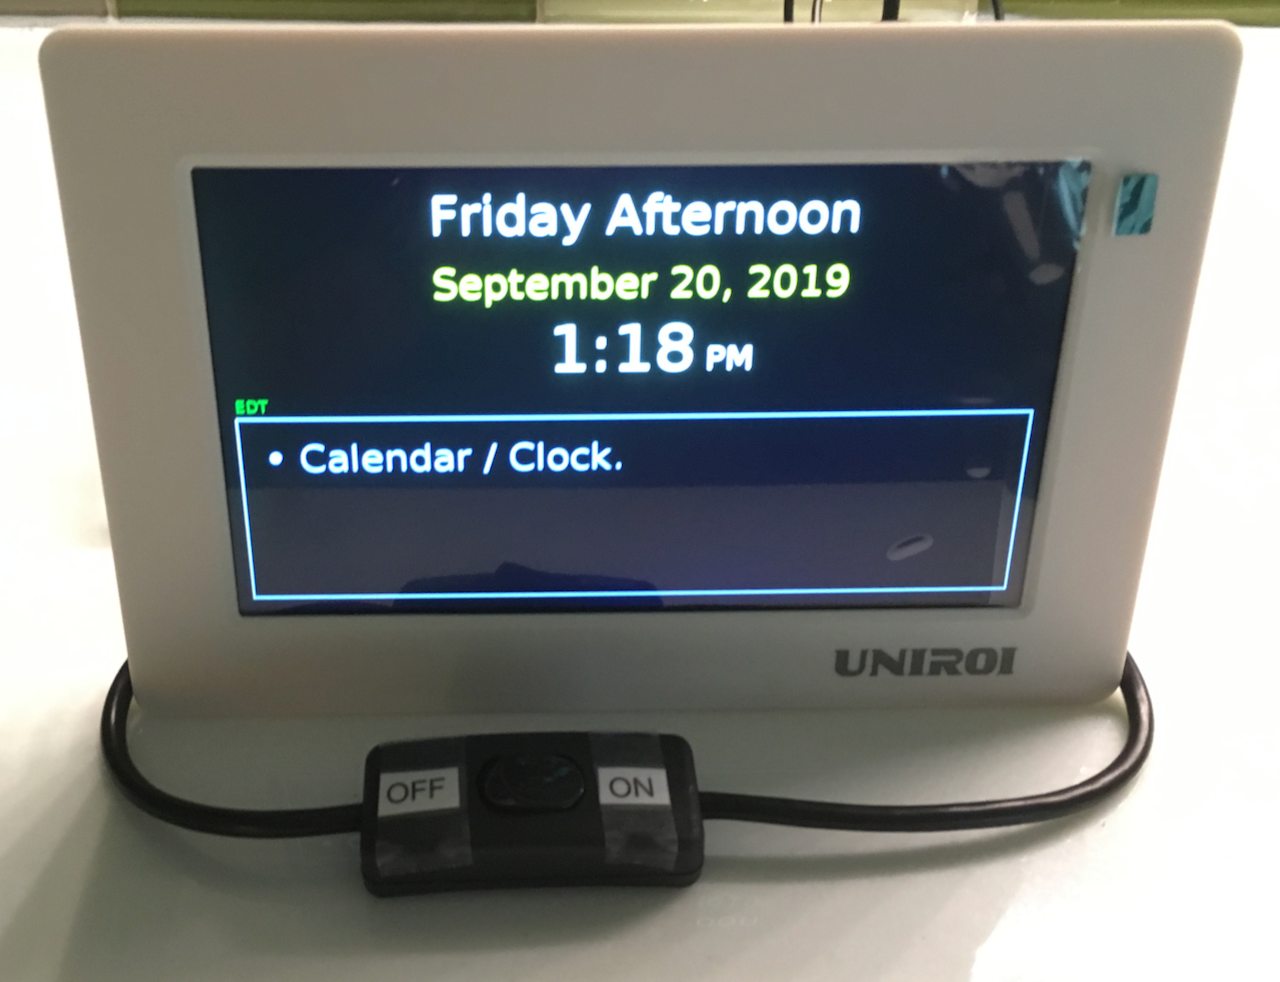
(The green tab in the upper right corner is a pull-tab for the plastic screen protector, which is removed after installation.)
The text "Calendar / Clock" in the box is just an example of a message that might appear there. For the first few minutes after booting, the timezone appears in small green text above and to left of the message box. If the Raspberry Pi has successfully acquired an IP address, the IP address appears after the timezone.
The on/off switch in front turns off the monitor but leaves the computer running. Although the software contains code to dim the screen at night, even with the screen completely black there still a noticeable glow from the backlighting. I added the front switch for the monitor power in case this became a problem when trying to go to sleep.
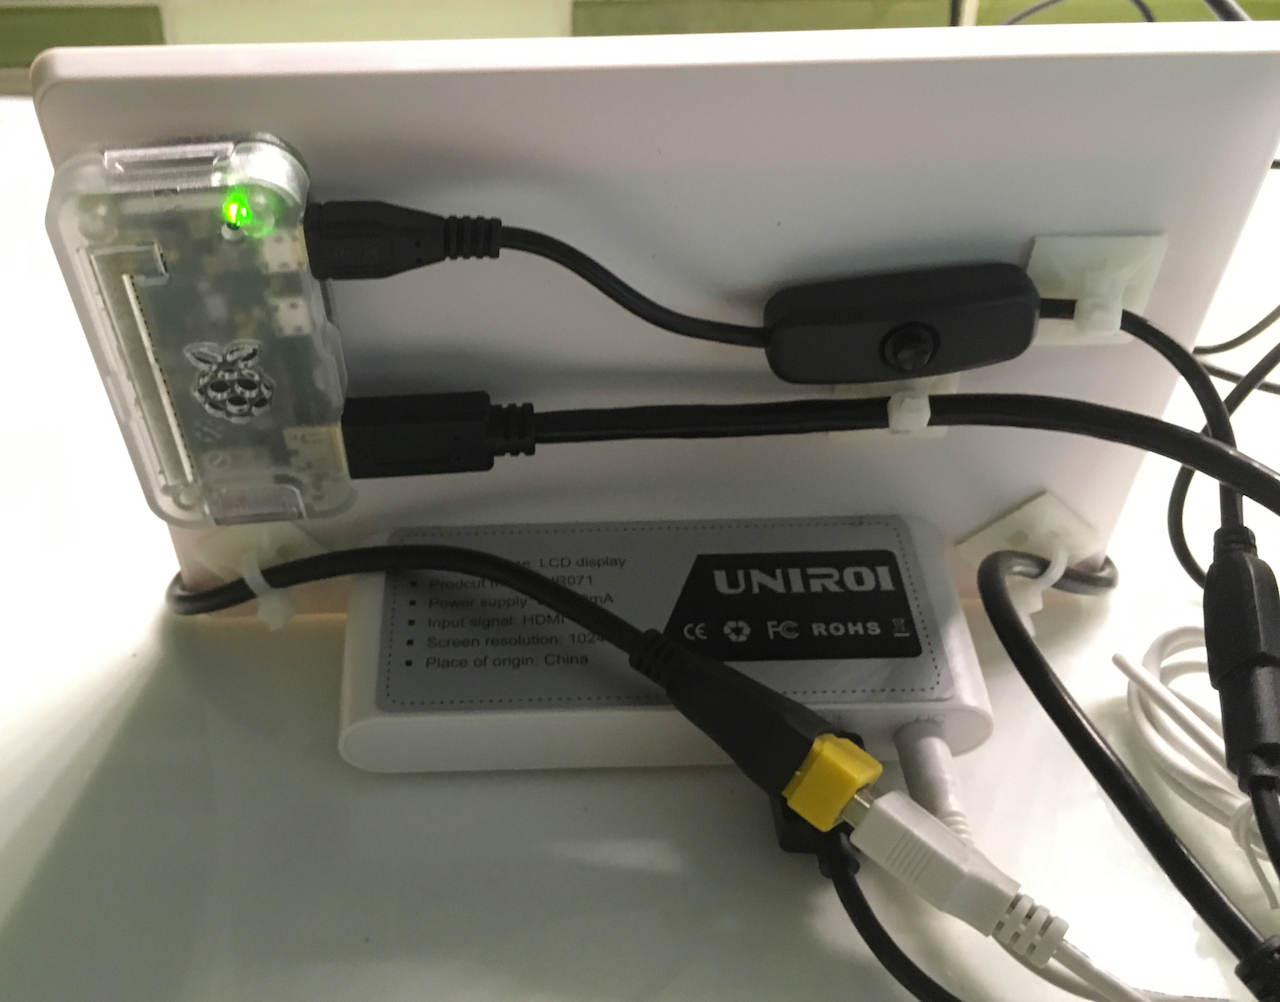
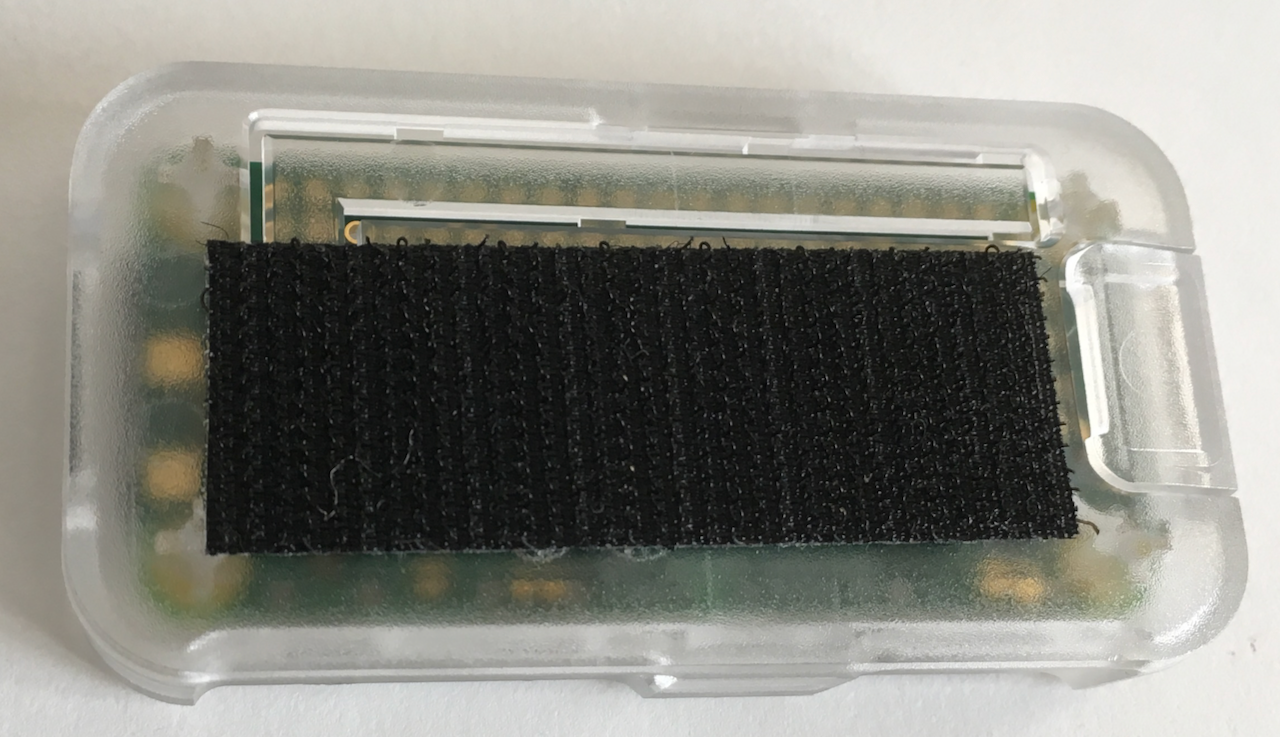
The back of the monitor has the Raspberry Pi attached on the left with Velcro® hook and loop fastening. Cables are attached to the monitor with zip ties and adhesive pads. The on/off switch cable on the back controls power to the computer. (The switch cable is the one plugged in at the upper right of the Raspberry Pi; it's a bit hard to see the switch button in this photo.)
Operation
At present, the user interface is quite minimal, namely remote editing of a text file on the Raspberry Pi. Whenever
the message text changes, the software also writes to a remote server an image file of the new screen (screen.png); this serves as confirmation that
the software is responding to the control file.
Here is a sample of the https://example.net/relay/screen.png file (where "example.net" stands in for
the personal domain I use for the remote server):
Here is a sample of the control file, notes.txt:
DAY_OF_WEEK WED - 11:30 13:20 Call Peter at 1:15 pm
ONE_TIME 2019-10-25 2019-10-25 11:30 13:00 Lunch with Jane
DATE 11-03 11-03 - - Mark's birthday
#
#DATE 09-03 09-10 11:00 13:15 Message
#ONE_TIME 2019-09-03 2019-09-05 - - Message
#DAY_OF_WEEK WED - 10:00 13:00 Message
#DAILY - - 07:00 14:00 Message
#NOW - - - - Message
#USE_BRIGHT - - 07:00 20:00
#DIM_VALUE - - - - 0.3
- Control file has one command per line.
- Lines beginning with # are comments.
- Command format is: [Command type] [Start date] [End date] [Start time] [End time] [Message or value].
- Unused fields are replaced with - (hyphen).
- If time range is not specified, then 00:00 to 23:59 is assumed.
- Command
DATE: show message every year on date(s) specified. - Command
ONE_TIME: show message on specific date(s) specified. - Command
DAY_OF_WEEK: show message every week on day specified. - Days of week are:
SUN MON TUE WED THU FRI SAT. - Command
DAILY: show message every day. - Command
NOW: show message immediately and keep showing until command is removed. - Command
USE_BRIGHT: set screen to full brightness in specified time range; dim at other times. - (Default bright time is 07:00 to 20:00)
- Command
DIM_VALUE: fraction of full brightness to be used when screen is dimmed. - (Default dim value is 0.1)
Device Hardware
Prices are approximate as of September 2019. Total outlay for the parts below was about $130, not including sales tax.
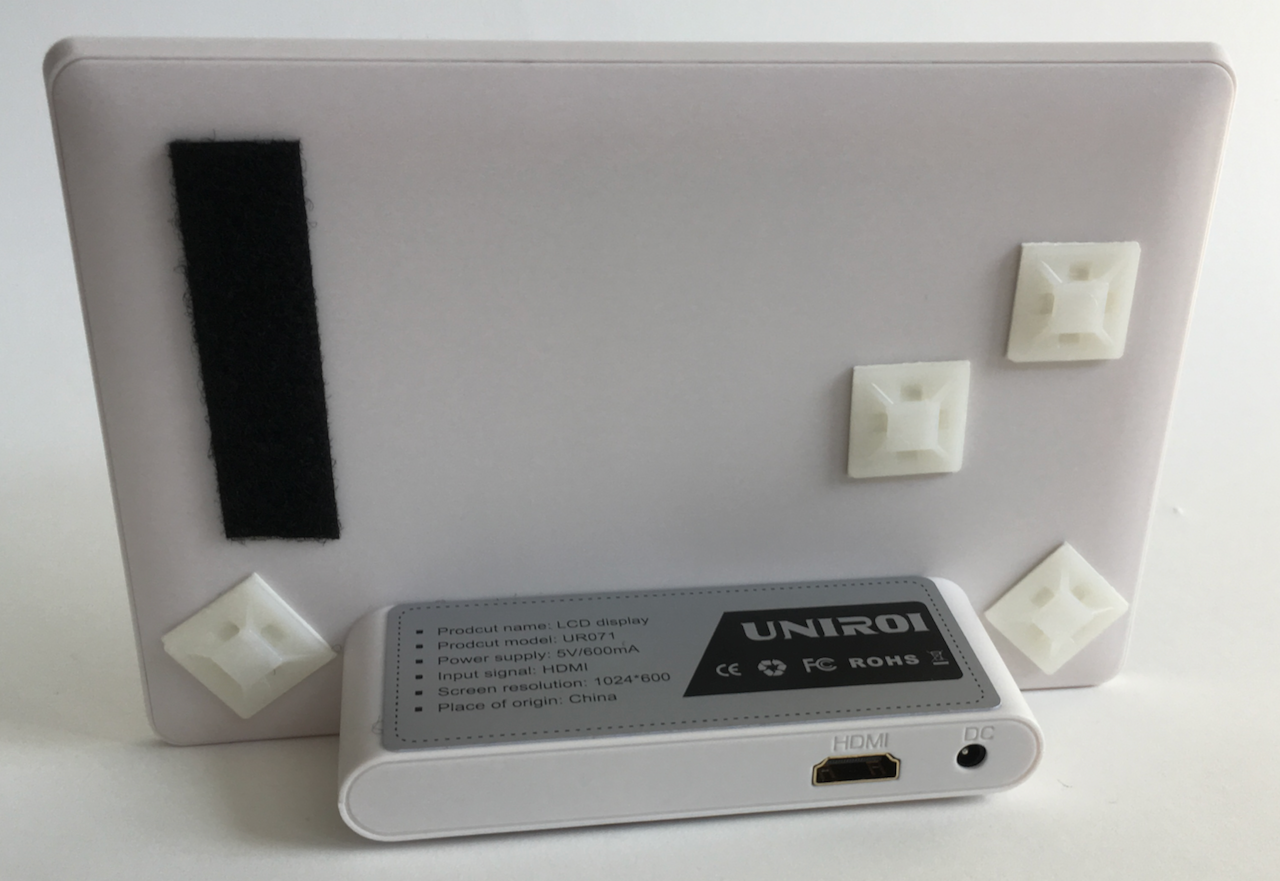
UNIROI 7 Inch HD LCD Screen for Raspberry Pi 1024 X 600 HDMI Monitor from Amazon. $50

Raspberry Pi Zero W from Adafruit. $10

5V 2.5A Switching Power Supply with 20AWG MicroUSB Cable from Adafruit. $7.50

Pi Zero Case - Frost/Clear from Adafruit. $6

SanDisk 16GB Ultra microSDHC UHS-I Memory Card with Adapter Amazon. $6

Mini HDMI Male to HDMI Female Converter Adapter Cable - 6-Inch from Amazon. 2-pack $3
HDMI Cable - 1 Foot - Black from Amazon. $7

Male to Female USB Cable Adapter with On/Off Switch from Amazon. $7
The white cable was included with the monitor.
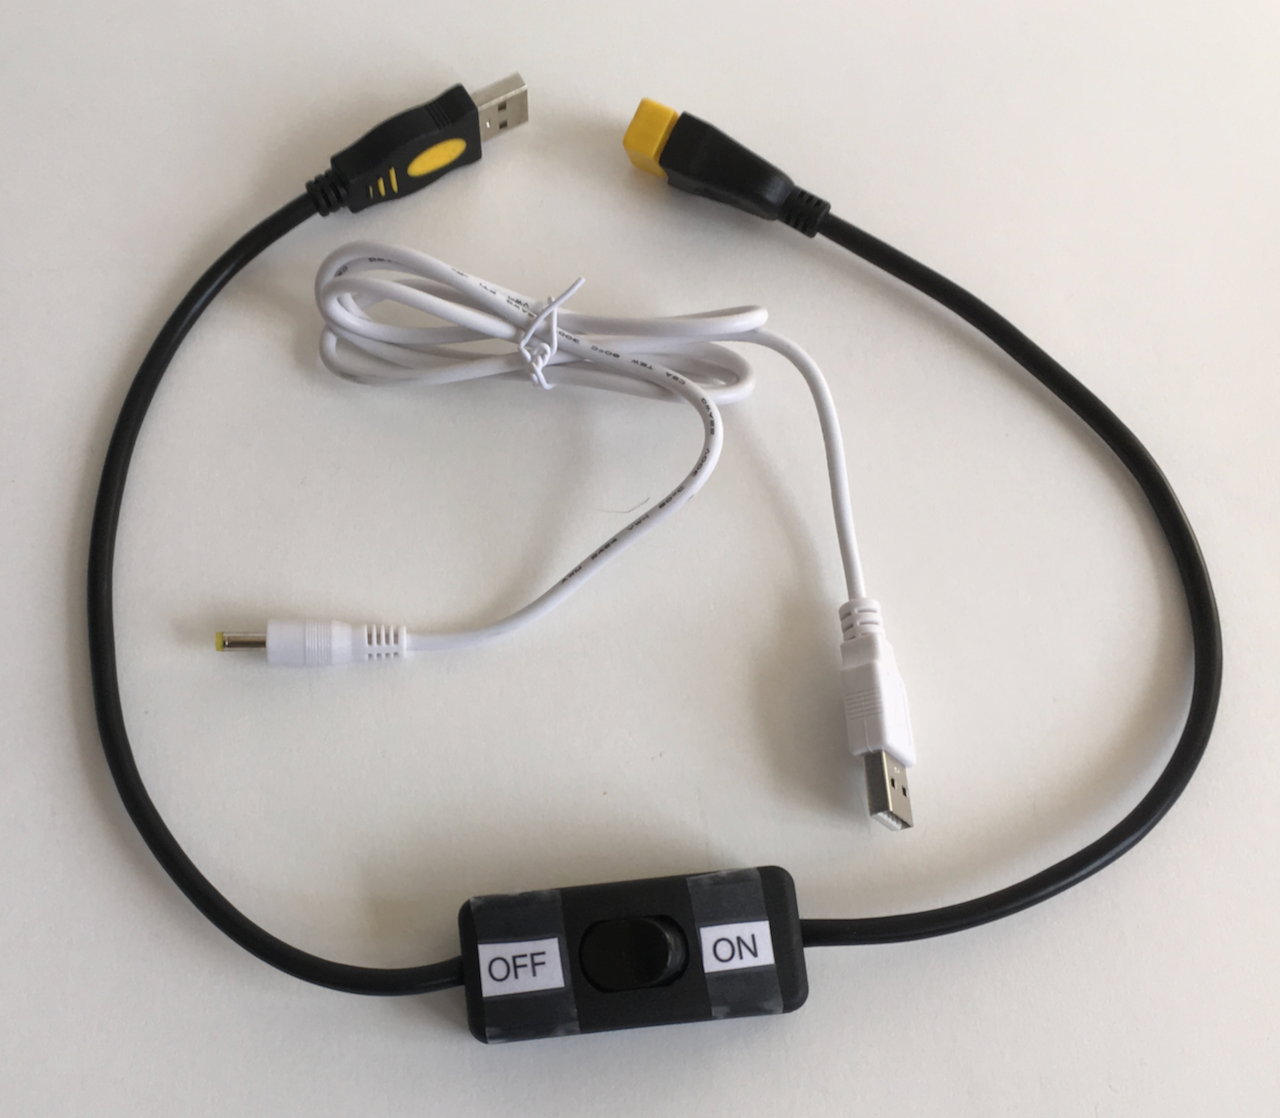
MicroUSB Push On Off Power Switch Cable for Raspberry Pi from Amazon. $4

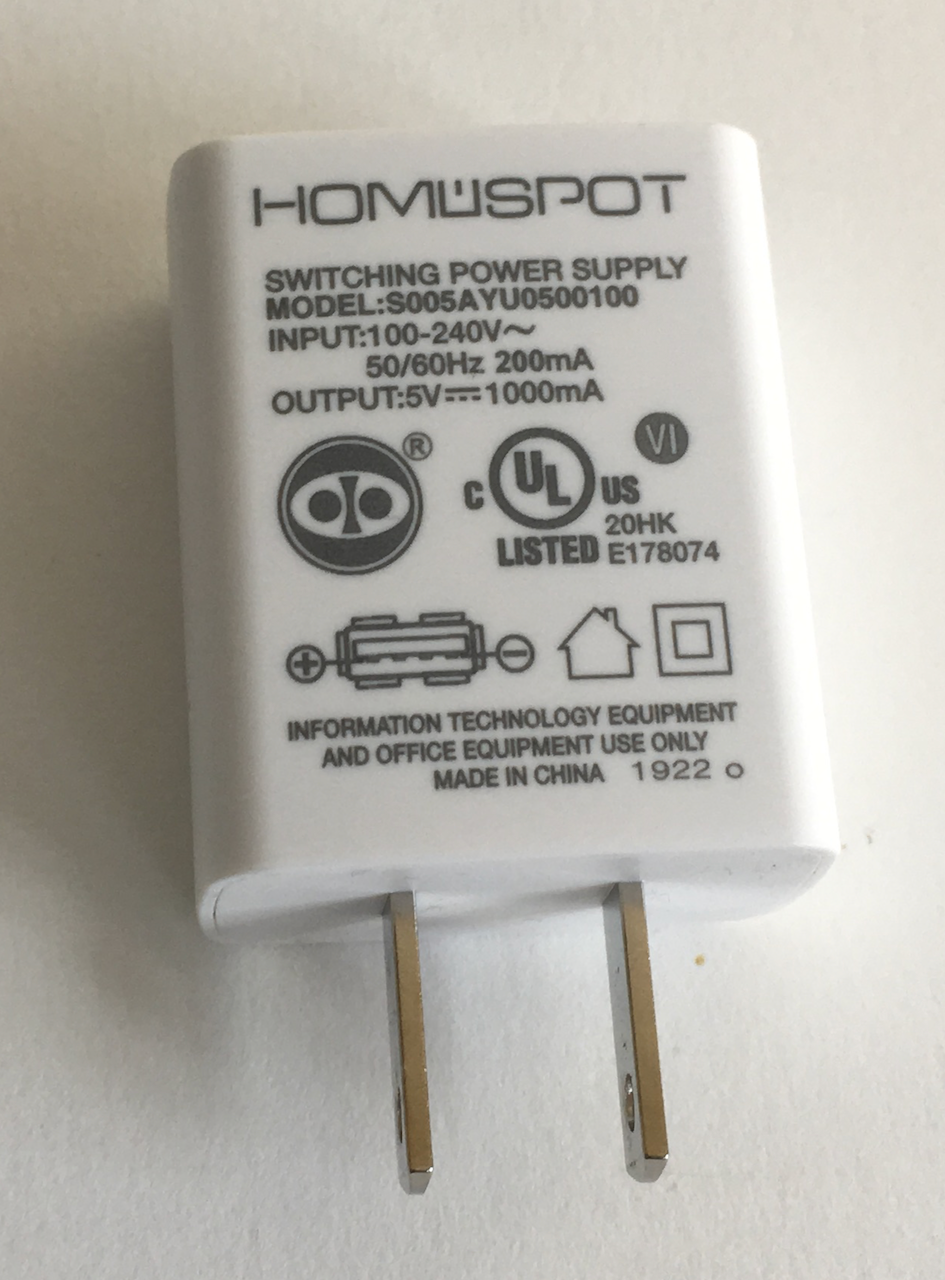
UL Certified USB Wall Charger 5V1A Plug from Amazon. $7
The monitor came with a USB power supply that wasn't UL-certified. I decided I'd prefer to use one that was.
100 Pack Zip Tie Adhesive Mounts from Amazon. $11

USB 2.0 Extension Cable - A-Male to A-Female Adapter Cord - 6.5 Feet from Amazon. $5

Development Hardware
These items weren't needed for the device itself, but I found them useful for development and to have available on site while setting up.
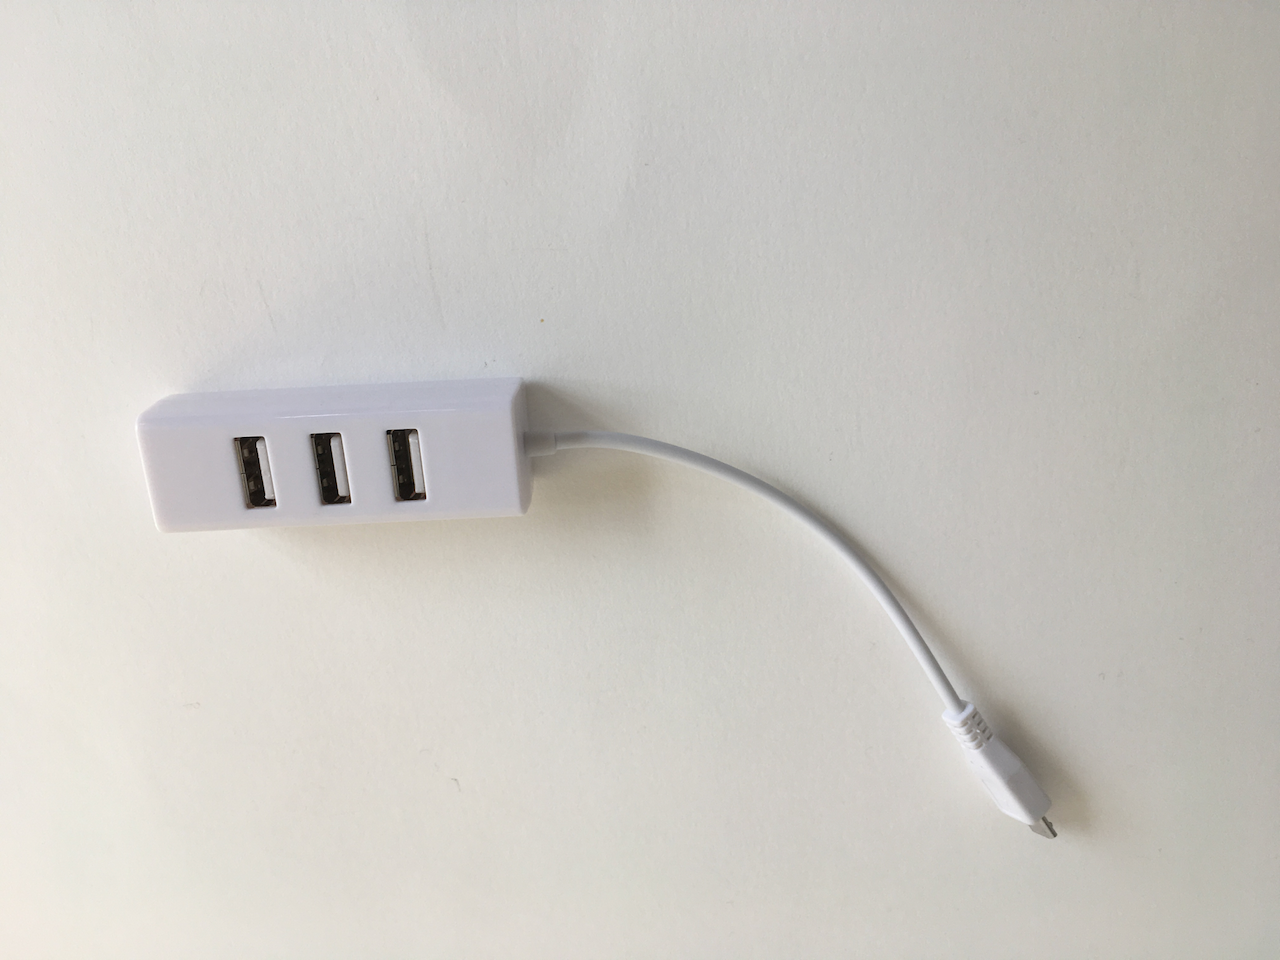
MicroUSB to USB 4 Port OTG Hub from Amazon. $6
Plugable Foldable Keyboard from Amazon. $55

Folds up nicely for stowing in luggage! Can be used as both Bluetooth and wired USB keyboard!

Networking
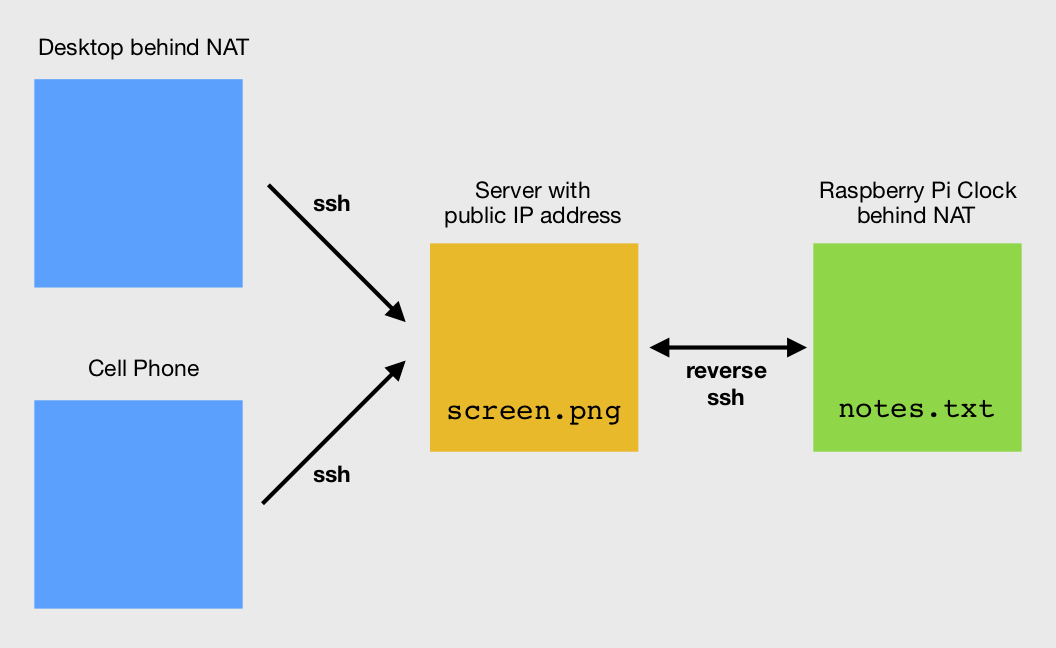
Ideally, it would be possible for the client systems (e.g., desktop computer, mobile phone) to reach the Raspberry Pi via ssh directly, without having to go through an intermediate system. (At least it would be nice to avoid an intermediate system that I would have to set up and pay for.)
One suggested solution is pwnat. It sounds great, but it doesn't seem to work for everyone. Given the fact that I would have limited time for debugging on-site, I wanted something more bullet-proof.
There's also the added complication that neither endpoint has a static IP address. If they did, and if there was full access to the NAT routers, then port forwarding could work.
In the end, it seemed the most reliable configuration would be if I used my own intermediate server with a static public-facing IP address. I've previously used https://lowendbox.com to find extremely cheap hosting, but ever since my last server from there abruptly shut down and the hosting company went out of business, I've been a bit wary of extreme low-end vendors. I opted for a nice $5 / month plan from linode, a company I have reliably used in the past, for a virtual private server (VPS) with 1 GB Ram, 1 CPU Core, 25 GB SSD, 1 TB Transfer. I installed CentOS 7 on the VPS. (See below for set up information.) For convenience, I attached a spare domain name that I own to the server, although I could just as well have used the static IP address of the server to reach it.
The general technique is called "Reverse ssh tunneling." In this method, the Raspberry Pi establishes an ssh connection to the public server, and the client system also establishes an ssh connection to the public server. The public server then patches the two connections together. I referred to the following helpful posts about how to set it up:
- https://juliansimioni.com/blog/howto-access-a-linux-machine-behind-a-home-router-with-ssh-tunnels/
- http://xmodulo.com/access-linux-server-behind-nat-reverse-ssh-tunnel.html
- https://everydayabhay.wordpress.com/2017/06/23/how-to-remotely-control-your-computer-behind-nat-router-and-firewall/
- https://www.everythingcli.org/ssh-tunnelling-for-fun-and-profit-autossh/
- https://www.linux.com/news/keeping-your-ssh-connections-alive-autossh/
The remainder of this post has far more detail than any casual reader is likely to be interested in. I have tried to make it complete enough for anyone "skilled in the art" to recreate everything I did.
Combining tips from all them, and bearing in mind that the Raspberry Pi is running Raspbian Stretch and the linode VPS is running CentOS 7.7, these are steps I followed.
Note: these steps should done after the "Introduction" and "Names" sections in the System Setup: VPS Server description below.
During these setup steps, the Raspberry Pi is assumed to be on a network local to the client desktop on which the following commands are typed. In the text below, example.net is used as a placeholder for the domain name of the linode server and raspi is used as a placeholder for the local hostname (or IP address) of the Raspberry Pi.
Create a non-admin account ("relay") on the linode VPS to handle tunnelling. Provide for ssh key login to the account.
ssh admin@example.net
# Create account:
sudo useradd relay
sudo passwd relay
exit

ssh relay@example.net
# Set up for ssh key login to new account:
mkdir -p ~/.ssh
chmod -R 700 ~/.ssh/
touch ~/.ssh/authorized_keys
chmod 600 ~/.ssh/authorized_keys
exit

ssh pi@raspi
# Set up key login from Raspberry Pi
ssh-keygen -b 4096
scp ~/.ssh/id_rsa.pub relay@example.net:~/.ssh/authorized_keys
# Test login (should not ask for password)
ssh relay@example.net
exit
exit
Open ports on VPS to be used for tunnelling. Ports 9922 and 9927 are for the installed unit. Ports 8822 and 8827 are for development work.
ssh admin@example.net
sudo firewall-cmd --permanent --add-port=9922/tcp
sudo firewall-cmd --permanent --add-port=9927/tcp
sudo firewall-cmd --permanent --add-port=8822/tcp
sudo firewall-cmd --permanent --add-port=8827/tcp
sudo firewall-cmd --reload
sudo firewall-cmd --list-ports
exit
Test tunnelling
ssh pi@raspi
# Open reverse tunnel
ssh -fN -R example.net:9922:localhost:22 relay@example.net
Leave above ssh connection running. Open new terminal window and connect to VPS server.
ssh relay@example.net
# Check port
sudo netstat -nap | grep 9922
# should see something like:
# tcp        0      0 127.0.0.1:9922          0.0.0.0:*               LISTEN      27599/sshd: relay

# Connect to Raspberry Pi via tunnel
ssh -p 9922 pi@localhost
Exit from everything.
Install autossh software on Raspberry Pi.
sudo apt-get install autossh
Create a script run-screen on Raspberry Pi to automatically establish / reestablish ssh tunnel.
ssh pi@raspi
sudo vi /usr/local/bin/run-screen
Insert text:
#!/bin/bash
autossh -M 9927 -fN -o "PubkeyAuthentication=yes" -o "StrictHostKeyChecking=false" -o "PasswordAuthentication=no" -o "ServerAliveInterval 60" -o "ServerAliveCountMax 3" -R 9922:localhost:22 relay@example.net
Create a service run-screen.service on Raspberry Pi to start run-screen at boot.
sudo vi /etc/systemd/system/run-screen.service
Insert text:
[Unit]
After=default.target

[Service]
Type=simple
User=pi
ExecStart=/bin/bash /usr/local/bin/run-screen
RemainAfterExit=yes

[Install]
WantedBy=default.target
Enable service and reboot Raspberry Pi.
sudo systemctl enable run-screen.service
sudo reboot
Wait for a minute, then log in to VPS server and test tunnel.
ssh relay@example.net
# Check port
sudo netstat -nap | grep 9922

# Connect to Raspberry Pi via tunnel
ssh -p 9922 pi@localhost
Now, even if the server reboots, the Raspberry Pi is powered off and back on, or the network connection is temporarily lost, the tunnel should be automatically reestablished.
System Setup
Raspberry Pi
The following assumes a macOS computer with an SD card reader attached, and a Raspberry Pi Zero W with monitor, keyboard, and mouse.
- Download and install balenaEtcher on the Mac.
- Download
2019-04-08-raspbian-stretch.zipfrom http://downloads.raspberrypi.org/raspbian/images/raspbian-2019-04-09/. - Use balenaEtcher to flash microSD card.
- Boot Raspberry Pi with the flashed SD card.
On first boot, the Raspberry Pi will show a series of screens, beginning with this one.
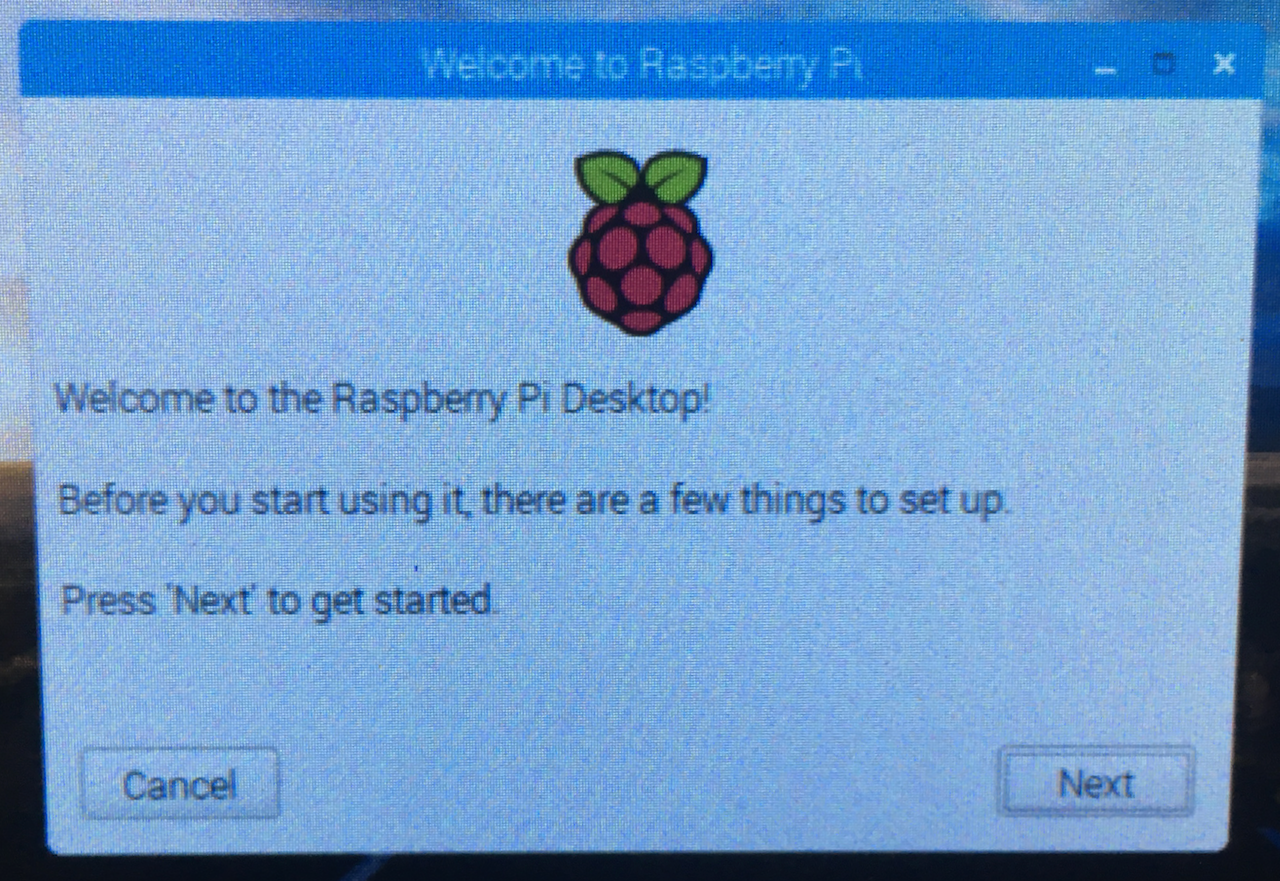
Proceed through the screens, and restart at the end of the series.
- Set Country. Set country, language, timezone.
- Change Password.
- Set up screen. Check the box for "This screen shows a black border around the desktop," if appropriate.
- Select WiFi Network.
- Update Software. Skip
- Setup Complete. Before clicking Restart, make any additional changes necessary for the WiFi network. Right-click the WiFi icon near the upper right, choose Wireless & Wired Network Settings, and make changes, e.g., static IPv4 address, router address, disable IPv6, DNS server address.
- Restart.
After rebooting, click the upper left icon and choose Preferences > Raspberry Pi Configuration.

Change entries for each tab as follows:
- System tab. Change hostname to raspi. Boot to CLI (No autologin).
- Interfaces. Enable SSH.
- Localisation. Change locale to en_US.UTF-8. Change keyboard as needed, e.g., Model Generic 104-key PC.
- Restart.
From this point on, access the Raspberry Pi via SSH on the Mac. I find it convenient to use a static IP address for the Pi, represented by r.r.r.r below.
Make changes for the Uniroi monitor. They supply a batch file to make these changes; I prefer to make the changes directly by editing config.txt.
ssh pi@r.r.r.r
sudo vi /boot/config.txt
Append the following:
max_usb_current=1
hdmi_force_hotplug=1
config_hdmi_boost=10
hdmi_group=2
hdmi_mode=87
hdmi_cvt 1024 600  60 6 0 0 0
Reboot.
sudo reboot
Update system.
ssh pi@r.r.r.r
sudo apt-get update
sudo apt-get upgrade
sudo reboot
Change the console font.
ssh pi@r.r.r.r
sudo dpkg-reconfigure console-setup
- Encoding to use on the console: UTF-8
- Character set to support: Guess optimal character set
- Font for the console: Terminus
- Font size: 12x24
Change the console prompt by editing .bashrc.
vi .bashrc
Insert the following:
PS1='\e[1;32m\$ \e[m'
Reboot.
sudo reboot
Test framebuffer display.
ssh pi@r.r.r.r
sudo apt-get -y install fbi
cd ~/Pictures
wget http://adafruit-download.s3.amazonaws.com/adapiluv320x240.jpg
# display picture for 5 seconds
sudo fbi -T 2 -t 5 -1 -d /dev/fb0 --noverbose -a /home/pi/Pictures/adapiluv320x240.jpg
Set up bluetooth keyboard.
sudo bluetoothctl
power on
scan on
Put the bluetooth keyboard in discovery mode. For the Pluggable Keyboard mentioned above, this is done by typing Fn-C.
When the scan finds the keyboard a line like this will be displayed, where XX:XX:XX:XX:XX:XX
represents the bluetooth address
of the keyboard:
[CHG] Device XX:XX:XX:XX:XX:XX Name: Plugable Folding Keyboard
Continue bluetooth setup:
pair XX:XX:XX:XX:XX:XX
trust XX:XX:XX:XX:XX:XX
connect XX:XX:XX:XX:XX:XX
quit
Edit the bluetooth configuration file, to provide for automatic connection and reconnection.
sudo vi /etc/bluetooth/main.conf
Append these lines.
ReconnectIntervals=1
ReconnectAttempts=30
Before installation at the final location, add information for the site's WiFi network by editing
wpa_supplicant.conf.
sudo vi /etc/wpa_supplicant/wpa_supplicant.conf
Insert an entry for the final location's SSID (on_site_ssid) and password (on_site_password).
ctrl_interface=/var/run/wpa_supplicant
update_config=1
country=US

network={
        ssid="on_site_ssid"
        psk="on_site_password"
}

network={
        ssid="my_ssid"
        psk="my_password"
        key_mgmt=WPA-PSK
}
Edit the dhcpcd.conf file.
sudo vi /etc/dhcpcd.conf
Comment out any static IP information for the local development network. (This assumes the final location uses a WiFi access point with DHCP.)
interface wlan0
#SSID my_ssid
#static ip_address=r.r.r.r/24
noipv6
#static routers=r.r.r.10
#static domain_name_servers=d.d.d.d
Install tool to provide more information about network environment; may be useful for debugging later.
sudo apt-get install dnsutils

# show WAN IP address
dig @resolver1.opendns.com ANY myip.opendns.com +short
VPS Server
Introduction
- Install CentOS 7 on a virtual private server (VPS) from a hosting provider, e.g., Linode.
- Obtain a domain name from a domain registrar, e.g., Pair Domains.
- Obtain an SSL certificate from a certificate authority, e.g., namecheap.com.
The following instructions are adapted from:
- https://linode.com/docs/getting-started/
- https://linode.com/docs/security/securing-your-server/
- https://www.linode.com/docs/networking/dns/configure-your-linode-for-reverse-dns/
- https://www.linode.com/docs/web-servers/apache/install-and-configure-apache-on-centos-7/
- https://support.comodo.com/index.php?/Knowledgebase/Article/View/637/0/certificate-installation-apache--mod_ssl
In these instructions:
- Replace (
w.x.y.z) with the IPv4 address of the VPS. - Replace
aaaa:bbbb:cccc:dddd:eeee:ffff:gggg:hhhh) with the IPv6 address of the VPS. - Replace (
example.net) with the domain name to be assigned to the server. - Replace (
self@example.com) with a working email address.
Names
At the domain registrar (e.g. Pair Domains):
- Enable Custom DNS records
- Modify A record to w.x.y.z
- Add AAAA record to aaaa:bbbb:cccc:dddd:eeee:ffff:gggg:hhhh
It may up to 24 hours for the DNS record to become active. Use the host command (on macOS Terminal) to verify the domain name is working:
$ host example.net
example.net has address w.x.y.z
example.net has IPv6 address aaaa:bbbb:cccc:dddd:eeee:ffff:gggg:hhhh
Log in to root account and set host name information. (Replace w.x.y.z
with the actual address of the VPS.)
ssh root@w.x.y.z
yum update
hostnamectl set-hostname example
Edit the hosts file
vi /etc/hosts
And append the following, replacing (w.x.y.z) and
(aaaa:bbbb:cccc:dddd:eeee:ffff:gggg:hhhh with the actual addresses of the VPS.
w.x.y.z example.net example
aaaa:bbbb:cccc:dddd:eeee:ffff:gggg:hhhh example.net example
Create an administrative user.
useradd admin
passwd admin xxxxx
usermod -aG wheel admin
reboot
Log in via the new user. Edit sshd_config to disable root logins over SSH
and listen on only one internet protocol.
ssh admin@w.x.y.z
sudo vi /etc/ssh/sshd_config
Change / uncomment these lines:
PermitRootLogin no
AddressFamily inet
Restart SSH:
sudo systemctl restart sshd
If the hosting company provides for reverse DNS, follow the appropriate instructions, such as:
- Disable Custom DNS at the registrar (e.g. Pair Domains).
- Change name servers from registrar's:
to hosting provider's (e.g., Linode):
NS5.PAIRNIC.COM NS6.PAIRNIC.COMns1.linode.com ns2.linode.com ns3.linode.com ns4.linode.com - Add DNS records for
example.netat hosting provider:SOA example.net self@example.com NS ns1.linode.com ns2.linode.com ns3.linode.com ns4.linode.com A w.x.y.z AAAA aaaa:bbbb:cccc:dddd:eeee:ffff:gggg:hhhh - Change reverse DNS for the VPS from
something.members.linode.comtoexample.net - Wait up to 24 hours.
- Verify reverse DNS is active by using the
hostcommand (on macOS Terminal):$ host w.x.y.z z.y.x.w.in-addr.arpa domain name pointer example.net.
Networking
At this point, the Networking section above can be completed.
Install Apache web server
ssh admin@example.net
sudo yum install httpd

# back up default config file
cp /etc/httpd/conf/httpd.conf ~/httpd.conf.backup
Open web ports in firewall.
sudo firewall-cmd --add-service=http --permanent
sudo firewall-cmd --add-service=https --permanent
sudo systemctl restart firewalld
Edit config file.
sudo vi /etc/httpd/conf/httpd.conf
Change / comment out / uncomment these lines:
ServerAdmin self@example.com
ServerName example.net:80
#    Options Indexes FollowSymLinks
     Options -Indexes +FollowSymLinks
#AllowOverride None
 AllowOverride All
Verify config file by using the /usr/sbin/httpd -t command. Output should look like this:
$ /usr/sbin/httpd -t
Syntax OK
Start web server:
sudo systemctl enable httpd.service
sudo systemctl start httpd
Verify server status by using the systemctl status httpd command.
Output should look something like this:
$ systemctl status httpd
• httpd.service - The Apache HTTP Server
   Loaded: loaded (/usr/lib/systemd/system/httpd.service; enabled; vendor preset: disabled)
   Active: active (running) since Tue 2019-10-29 17:30:46 UTC; 12s ago
Typing http://example.net in a browser should produce the Apache welcome page.
Create an index page.
sudo vi /var/www/html/index.html
Enter the following text.
<!DOCTYPE html>
<html>
<head>
<title>example</title>
<meta name="viewport" content="width=device-width, initial-scale=1">
<style>
body {
  background-color: lightgray;
  color: navy;
  font-family: Courier;
}
</style>
</head>
<body>
<p>example.net</p>
</body>
</html>
Typing http://example.net in a browser should produce the above index page.
Secure web access
Download to desktop computer the certificate files from the certificate authority, e.g.:
- example_net.zip
- example.net.key
Copy files to VPS server.
scp example_net.zip admin@example.net:/home/admin/
scp example.net.key admin@example.net:/home/admin/
Install files on VPS server.
ssh admin@example.net
sudo yum install mod_ssl
sudo yum install unzip
sudo yum install wget

unzip example_net.zip

sudo cp example_net.crt /etc/pki/tls/certs/
sudo cp example_net.ca-bundle /etc/pki/tls/certs/
sudo cp example.net.key /etc/pki/tls/private/
Edit ssl.conf:
sudo vi /etc/httpd/conf.d/ssl.conf
Include / edit the following lines:
SSLCertificateKeyFile /etc/pki/tls/private/example.net.key
SSLCertificateFile /etc/pki/tls/certs/example_net.crt
SSLCertificateChainFile /etc/pki/tls/certs/example_net.ca-bundle
Restart web server:
sudo systemctl restart httpd
Test https access by visiting https://example.net
Require https access by creating or editing file .htaccess:
sudo vi /var/www/html/.htaccess
Append these lines:
RewriteEngine On
RewriteCond %{HTTPS} !on
RewriteRule (.*) https://%{HTTP_HOST}%{REQUEST_URI}
Restart web server:
sudo systemctl restart httpd
Clear browser history, then test by visiting http://example.net - browser should go to https://example.net
Set up password access for user "webuser".
sudo htpasswd -c /etc/httpd/.htpasswd webuser
sudo chown apache:apache /etc/httpd/.htpasswd
sudo chmod 0660 /etc/httpd/.htpasswd
Edit .htaccess:
sudo vi /var/www/html/.htaccess
To contain this:
ErrorDocument 404 https://example.net/index.html
ErrorDocument 403 https://example.net/index.html

RewriteEngine On
RewriteCond %{HTTPS} !on
RewriteRule (.*) https://%{HTTP_HOST}%{REQUEST_URI}

SSLRequireSSL
AuthType Basic
AuthName "private"
AuthUserFile /etc/httpd/.htpasswd
Require valid-user
Restart web server:
sudo systemctl restart httpd
Clear browser history, then test by visiting example.net. Use "webuser" for the user name and the value supplied to the command htpasswd for the password.
Test sample screen file
Add a new directory writable by user 'relay'.
sudo mkdir /var/www/html/relay
sudo chown relay:apache /var/www/html/relay
sudo chmod 750 /var/www/html/relay
exit
Log in with user 'relay'.
ssh relay@example.net
Copy a sample screen file to relay's web directory.
cd /var/www/html/relay
wget https://7402.org/images/screend.png
exit
Clear browser history, then test by visiting https://example.net/relay/screend.png
iPhone and iPad
Install an SSH client app. I use Termius.
Software
Get sources from github and build. Note: this project
is presently just a proof of concept. The code is in an unfinished state.
ssh pi@r.r.r.r
mkdir Projects
cd Projects
git clone https://github.com/7402/time-screen.git
cd time-screen

# install library
sudo apt-get install libcairo2-dev

# build development version [change example.net to server domain]
# g++ -DDEV -DSERVER=example.net -Wall -g time-screen.cpp note.cpp -I/usr/include/cairo -L/usr/lib/arm-linux-gnueabihf/ -lcairo -o time-screend

# build release / installed version [change example.net to server domain]
# g++ -DSERVER=example.net -Wall -g time-screen.cpp note.cpp -I/usr/include/cairo -L/usr/lib/arm-linux-gnueabihf/ -lcairo -o time-screen
Copy the notes.txt file to the Projects directory.
Edit the ~/Projects/notes.txt file to set desired message display
cp ~/Projects/time-screen/notes.txt ~/Projects/notes.txt
vi ~/Projects/notes.txt
To test the development version, append to the command line the number of seconds for which it should run.
# run for 20 seconds
./time-screen 20
Edit the script run-screen to start time-screen.
sudo vi /usr/local/bin/run-screen
Replace the contents with this:
#!/bin/bash

# turn off blinking cursor
sudo su - -c "echo 0 > /sys/class/graphics/fbcon/cursor_blink"

# establish ssh tunnel
autossh -M 9927 -fN -o "PubkeyAuthentication=yes" -o "StrictHostKeyChecking=false" -o "PasswordAuthentication=no" -o "ServerAliveInterval 60" -o "ServerAliveCountMax 3" -R 9922:localhost:22 relay@example.net

# run time-screen
/home/pi/Projects/time-screen/time-screen
Reboot. The time-screen program should start automatically. The image at
https://example.net/relay/screen.png should update automatically whenever the messages change.
Disable the service.
ssh pi@r.r.r.r
sudo systemctl enable run-screen.service
sudo reboot
Create development versions of run-screen and run-screen.service that can run without
interfering with the installed version.
Create the script run-screend to start time-screend.
ssh pi@r.r.r.r
sudo vi /usr/local/bin/run-screend
Insert this: (Note use of alternate port numbers 8822 and 8827!)
#!/bin/bash

# turn off blinking cursor
sudo su - -c "echo 0 > /sys/class/graphics/fbcon/cursor_blink"

# establish ssh tunnel
autossh -M 8827 -fN -o "PubkeyAuthentication=yes" -o "StrictHostKeyChecking=false" -o "PasswordAuthentication=no" -o "ServerAliveInterval 60" -o "ServerAliveCountMax 3" -R 8822:localhost:22 relay@example.net

# run time-screend
/home/pi/Projects/time-screen/time-screend
Create a service run-screend.service to start run-screend at boot.
sudo vi /etc/systemd/system/run-screend.service
# and insert text:
[Unit]
After=default.target

[Service]
Type=simple
User=pi
ExecStart=/bin/bash /usr/local/bin/run-screend
RemainAfterExit=yes

[Install]
WantedBy=default.target
Enable the service and reboot.
sudo systemctl enable run-screend.service
sudo reboot
The time-screend program should start automatically. The image at
https://example.net/relay/screend.png should update automatically whenever the messages change.
Disable the service.
ssh pi@r.r.r.r
sudo systemctl disable run-screend.service
sudo reboot
Shut down the Raspberry Pi.
ssh pi@r.r.r.r
sudo poweroff
Make a backup of the SD card. Remove the card from the Raspberry Pi and insert it in the reader attached to the Mac.
launch the macOS Terminal program.
Figure out the drive path by using the diskutil command.
diskutil list
Look for a disk that is only 16GB in size, e.g.:
/dev/disk4 (external, physical):
   #:                       TYPE NAME                    SIZE       IDENTIFIER
   0:     FDisk_partition_scheme                        *15.9 GB    disk4
   1:             Windows_FAT_32 boot                    45.0 MB    disk4s1
   2:                      Linux                         15.9 GB    disk4s2
Use the dd to make a copy on the Mac. Be careful with dd; type the wrong thing and you can wipe out your computer's disk.
# replace disk4 with the correct disk number!
# sudo dd if=/dev/disk4 of=~/raspi-time-screen-sd-card.dmg
It takes an hour or so. When it's done, use the macOS Disk Utility to compress it.
- Launch Disk Utility.
- Choose Images > Convert....
- Choose: raspi-time-screen-sd-card.dmg
- Save As: raspi-time-screen-sd-card-converted.dmg
- Image Format: compressed
Possible Future Improvements
- Create a web interface for changing the messages.
- Display a slideshow of photos when there are no images.
- Add a modem (like this one perhaps) and implement a large-type caller ID display (that can be seen across the room).
- Eliminate separate power supplies for the Raspberry Pi and the monitor; the 2.5A Raspberry Pi supply should be able to power both of them.
- Add circuitry to cut power to the screen at night (under software control), thus completely eliminating the nighttime backlight glow.
Conclusion
This is not a product. It's not even a great open-source project. I don't recommend anyone trying to make it into a product unless they have a tech support system that can deliver cost-effective networking support to unsophisticated users of niche devices.
But it is an example of what someone with DIY software skills can do to solve a problem. If it inspires someone else to try something similar, I'll be happy. (And if you want me to document the source code some more, send me email!)