Personal Linux R Server (Part IV: Final Upgrades)
After completing Part III: Leveling Up, the server had been upgraded to a 4.0 GHz i7-4790K processor. This post covers the final equipment upgrades, including installation and setup of a Sapphire Radeon R9 280 graphics card.
Penultimate Orders
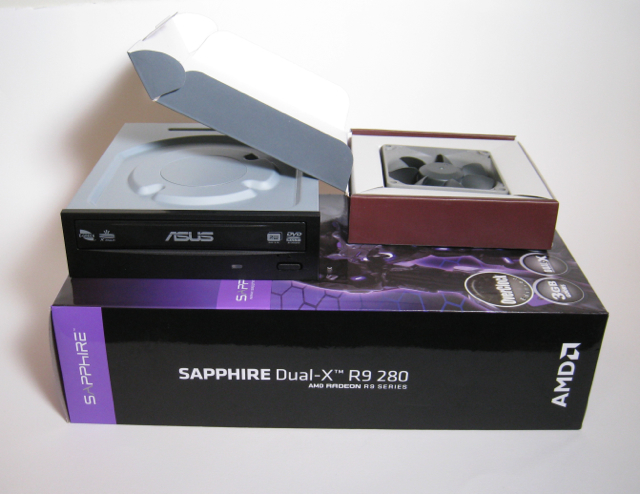
Asus DRW-24B1ST DVD-RW 24x optical drive
Noctua NF-R9 redux-1800 80mm case fan
Optical Disk Drive
A drive to read and write CDs and DVDs is a convenience rather than a necessity these days. The cost was about $20, so it didn't require a lot of cost/benefit analysis, though. Of more importance was whether or not it would fit along with the Noctua NH-L12 cooler.
Online discussions and the dimensions of the components were inconclusive, so I waited until the cooler was installed. In fact, the drive tray is a couple of mm below the top edge of the cooler, so compatibility would depend on how far back the drive would extend. I enlarged and printed out this photograph from a review of the Corsair 250D case. The cooler would clearly not fit with the drive in the photo. I could read the model number on the drive in the photo, and I looked up its specs; the Asus drive is shorter, so I gave it a try.
The Asus drive fits nicely. The motherboard conveniently comes with two SATA cables that have a right-angle connector, and that was beneficial when hooking up the drive and keeping the cable out of the way of the cooler's upper fan.
No additional drivers or setup was necessary. The drive was immediately recognized by the BIOS as well as CentOS.
Picking a Graphics Card for GPGPU
My main interest in a graphics card was as a platform for parallel computing (GPGPU: General-purpose computing on graphics processing units). The first decision I had in the process of choosing a graphics card was which framework to use, CUDA or OpenCL OpenCL. CUDA is proprietary to Nvidia, and OpenCL is open. That was an incentive for me to use OpenCL, although many do prefer CUDA for parallel processing. I was influenced by a discussion here, on "Which one do you prefer: CUDA or OpenCL?" An additional point in favor of OpenCL for me was that I already had non-Nvidia card in my Mac Pro (ATI Radeon HD 5770), and thus an additional system on which to develop and test OpenCL (but not CUDA) code.
Nvidia cards can use both CUDA and OpenCL, so the decision to use OpenCL did not yet narrow the choice of card.
There are high-end GPU cards designed specifically for workstation and general computational use (e.g., AMD FirePro, Nvidia Quadro and Tesla), but the original intention of building this server was to take advantage of relatively inexpensive consumer components aimed at the much-larger gaming and enthusiast market, in the hoping of winning the cost-benefit tradeoff. Accordingly, I look at the higher end of gaming graphics cards.
I referred to the GPU Hierarchy Chart in a recent review (Best Graphics Cards For The Money: March 2015) on tomshardware.com. I looked at the top half-dozen levels in the hierarchy chart, and picked out the current offerings from AMD and Nvidia.
Most gamers probably care about something other than just raw rates of floating-point-operations per second, but that is a spec that was available for all the cards, from review articles in Wikipedia: List of Nvidia graphics processing units and List of AMD graphics processing units. For lack of a better metric, I looked at these rates, with particular attention to double-precision GFLOPS.
First, here is a table showing the cards sorted in descending order of single-precision GFLOPS. (Prices are approximate.)
| Card | Price | SP GFLOPS |
|---|---|---|
| R9 295X2 | $740 | 11467 |
| R9 290X | $340 | 5632 |
| R9 290 | $310 | 4849 |
| GTX 980 | $550 | 4612 |
| GTX 970 | $340 | 3494 |
| R9 280X | $250 | 3482 |
| R9 285 | $220 | 3290 |
| R9 280 | $190 | 2964 |
| GTX 960 | $205 | 2308 |
This is reasonably consistent. Certainly within each family, the more you pay, the more single-precision GFLOPS you get. This implies that SP-GFLOPS correlates with whatever complex combinations of specs causes the gamer community to value one card over another.
It is quite a different story with double-precision; here the cards are sorted in descending order of DP-GFLOPS.
| Card | Price | SP GFLOPS | DP GFLOPS | SP:DP Ratio |
|---|---|---|---|---|
| R9 295X2 | $740 | 11467 | 1433 | 8 |
| R9 280X | $250 | 3482 | 870 | 4 |
| R9 280 | $190 | 2964 | 741 | 4 |
| R9 290X | $340 | 5632 | 704 | 8 |
| R9 290 | $310 | 4849 | 606 | 8 |
| R9 285 | $220 | 3290 | 207 | 16 |
| GTX 980 | $550 | 4612 | 144 | 32 |
| GTX 970 | $340 | 3494 | 109 | 32 |
| GTX 960 | $205 | 2308 | 72 | 32 |
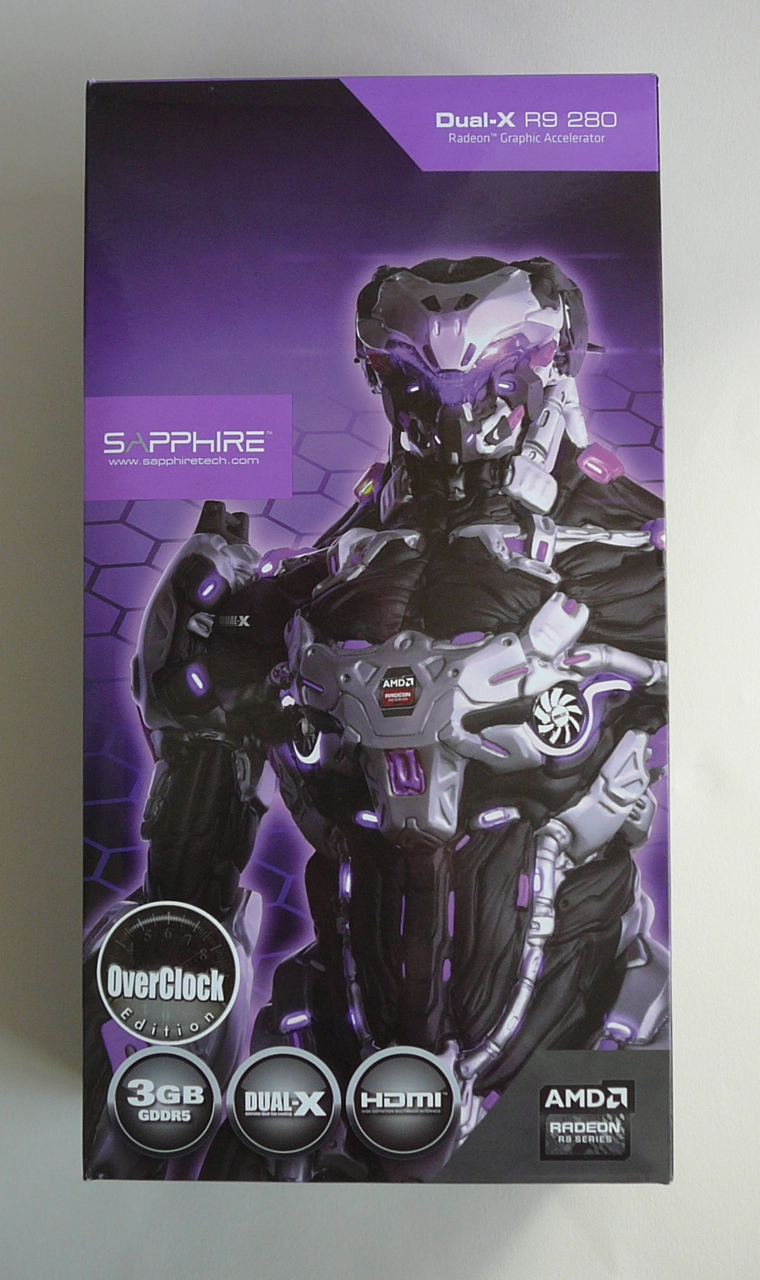
This is interesting, because there's very poor correlation between DP-GFLOPS and price. It indicates that the target market doesn't care much about DP-GFLOPS (consequently, the cards are not going to be priced as if they did). This is cool because I care about DP-FLOPS, even if they don't. The R9 280X and R9 280 seemed to be the price/performance bargains.
Lest there be any question about the intended market for the R9 280, here's the box.
The last column of the chart shows the ratio between double-precision and single-precision GFLOPS. The R9 280X and R9 280 use the "Tahiti" architecture, with a ratio of 4. The R9 290 and R9 290X use the "Hawaii" architecture with a less favorable ratio of 8. An article here, from November 2013, made an interesting claim regarding the R9 290:
It's also worth noting that AMD artificially handicaps Hawaii's FP64 throughput with a 1/8, compared to Tahiti's 1/4, rate. This is to allow FirePro cards based on the same GPU to offer another differentiator (we hear they'll be full-speed, or 1/2).
More fan
I knew that the graphics card would draw air into the case via its dual fans next to the side panel, and that the card would be generating more heat inside the case. I thought the system might benefit from an additional nearby exhaust fan, in one of the rear spaces reserved for an 80mm fan. I didn't realize that the card itself is already designed to exhaust a lot of its heated air out through vents right in the card slot covers - so maybe another fan was not needed as much as I thought. But the small Noctua fan is pretty quiet, so it probably didn't hurt much.
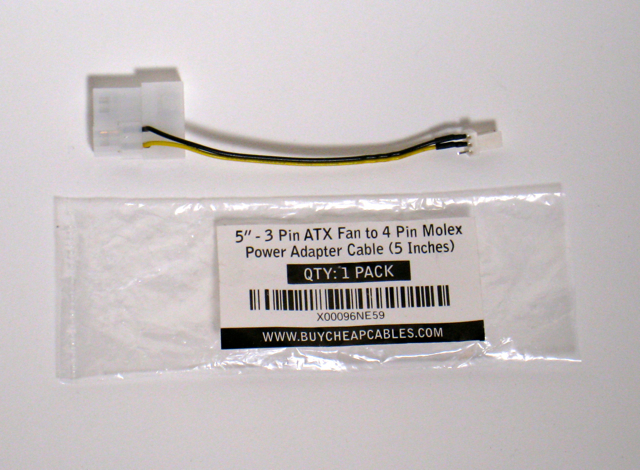
The two chassis fan headers on the motherboard were already used at this point, so the fan needed to be hooked up to the power supply and run continuously - another reason to opt for one of the more quiet of 80mm fans. I could have used a splitter and connected the new fan to be controlled by the motherboard along with the other 120mm exhaust fan, but that was not recommended since the fans were different types.
There were a lot of cables supplied with the power supply unit, but after the fan came I discovered the one I needed to connect the fan to the power supply was not among them. Hence, the second order above, for the adapter cable.
Graphics Card Installation and Setup
The long R9 280 graphics card fits in the Corsair 250D, which is one of the selling points of the case itself. I installed the card first, and then worked on attaching the power cables that connect at the top rear of the card. This was a rather tight fit, and was only possible because of a hole that was strategically located in the optical drive tray to allow access. Corsair knew what they were doing when they designed the case. It might have been a better tactic, however, if I had attached the cables first, before installing the card. It also might have been a less tight fit if I had used the cables supplied with the card instead of the bulkier cables supplied with the power supply.
After installation, I started up the system. I left a monitor attached to the VGA motherboard connector, but I also connected another monitor to a DVI connector on the graphics card. I had not changed any setting or installed and driver for the new card
It turned out that if a graphics card is installed (even with no monitor connected to the card), the default behavior of the Z97i-Plus motherboard is to ignore the on-board graphics and use only the graphics card for video output. This can be changed in the BIOS settings. To re-enable onboard graphics (while still allowing for use of the graphics card):
- Reboot and hit F2 to get BIOS setup screen.
- Choose the Advanced tab.
- Choose System Agent Configuration.
- Choose Graphics Configuration.
- For the item labeled "Primary Display" choose "CPU Graphics."
- For the item labeled "CPU Graphics Multi Monitor" choose Enabled.
The next step was to install the driver. The easiest way to get to the driver on the AMD site was to use FireFox via the GUI. First, start the GUI:
startx
and then launch FireFox and proceed as follows:
- Go to http://support.amd.com/en-us/download
- Scroll to the section titled, "Manually Select Your Driver."
- For step 1, select Desktop Graphics.
- For step 2, select Radeon R9 Series.
- For step 3, select Radeon R9 2XX Series.
- For step 4, select RHEL x86_64.
- At step 5, click Display Results
- Download "AMD Catalyst™
14.1215.5 Proprietary RHEL 6.0 x86_64 Display Driver" to your ~/Downloads directory. - Exit the graphical user interface by choosing System > Logout from the top menu bar.
Install the driver. (First install the dependency "redhat-lsb.")
cd ~/Downloads
sudo yum install redhat-lsb
sudo yum install fglrx64_p_i_c-14.501.1003-1.x86_64_RHEL6_64a.rpm
sudo yum install fglrx64_p_i_c-15.101.1001-1.x86_64_rhel6_64a.rpm
Run the configuration program.
sudo aticonfig --initial
This does various things, including installing software and backing up the current file at /etc/X11/xorg.conf and writing a new one. Assuming there is a monitor connected to the graphics card, the GUI will appear there by typing
startx
and the new software will be available by choosing System > Preferences > AMD Catalyst Control Center.
At this point I had two monitors hooked up and the graphics card appeared to be working correctly. The system would boot and display the command line with the on-board graphics, and display the GUI on the monitor attached to the card.
For normal use as a server, I wanted a normal configuration, so I swapped the /etc/X11/xorg.conf file back to its previous version and removed the monitor attached to the graphics card. After a reboot, the BIOS, command-line, and GUI all appeared again on the single monitor attached to the on-board graphics. I could store away the monitor and just use the system as a headless server, until the next time I needed to get to the BIOS settings or debug something that required direct access.
More Bling
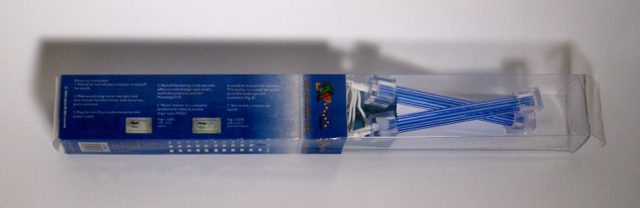
The last order, shown above, was a final extravagance: the addition of a cold-cathode fluorescent light (CCFL) to add a blue glow to the interior of the case. Nine dollars. The kit included two 4-inch tubes, but a single tube (mounted underneath the optical drive tray) was sufficient. The power cable in the kit is wired to a slide switch mounted in a card-slot cover. Both card slots are occupied by the graphics card, however, so I cut off and connected the wires that led to the switch.