Personal Linux R Server (Part II: Software Setup)
See Part I for selection of components, system assembly, and minimal installation of CentOS 6.6.
This post consists of lengthy notes on software installation; for more information on upgrading to higher-performance hardware, see Part III: Leveling Up.
At this point in the discussion, the system was hooked up to the internet via a wired ethernet connection, and network settings were entered as part of the installation process. A root account had been set up and a login prompt was on the monitor.
What follows is the protocol I settled on, after several iterations, for getting the system set up.
Contents
- Getting Started
- Installing Packages
- Enable Time Synchronization
- Installing RStudio Server
- Enable Temperature Monitoring
- Build and Install WiFi Driver
- Test WiFi with Graphical User Interface
- Add Repository and Install Sensor Applet
- Install Prime95 Stress-testing Tool
- Install Linpack Testing Tool (Optional)
- VNC Server Installation and Setup
- Beep Installation and Setup
- Fix Sound
- Benchmarks and Testing
- Things That Didn't Work When I Tried Them
- What's Next
Getting Started
Log in as root. The network needs to be turned on, as it is not initially active.
ifup eth0
This tests the network connection and updates everything in the minimal system.
yum update
Set the network to turn on automatically at startup, by editing:
vi /etc/sysconfig/network-scripts/ifcfg-eth0
and changing the appropriate line to
ONBOOT=yes
Add a user in the wheel group.
useradd michael
passwd michael
usermod -a -G wheel michael
Give members of the wheel group sudo privileges:
visudo
by uncommenting the appropriate line
## Allows people in group wheel to run all commands
%wheel  ALL=(ALL)       ALL
Restart, to verify the above steps.
reboot
From this point on, I could mostly avoid using the temporary monitor and keyboard connected to the new system and use ssh for access. I found it convenient to work that way, since I could use my desktop system for browser access and copying and pasting to and from my work notes and the OS X Terminal program.
Installing Packages
Log in from desktop machine via ssh as user.
ssh michael@172.16.1.20
Switch to root, to avoid repeated typing of sudo.
su -
Install lots of packages.
yum -y groupinstall "X Window System" "Desktop" "Fonts" "General Purpose Desktop"
yum -y groupinstall "Graphical Administration Tools"
yum -y groupinstall "Internet Browser"
yum -y groupinstall "Office Suite and Productivity"
yum -y groupinstall "Graphics Creation Tools"
yum -y groupinstall 'Development Tools'

yum -y install lm_sensors
yum -y install epel-release
yum -y install hddtemp

yum -y install R
yum -y install openssl098e

yum -y install kernel-headers kernel-devel gcc

yum -y install tigervnc-server

yum -y install wget
Return to user account.
exit
Enable Time Synchronization
Added 2015-08-3
Install and start package for synchronization to external time servers:
sudo yum install ntp
sudo chkconfig ntpd on
sudo ntpdate pool.ntp.org
sudo service ntpd start
Verify synchronization is working:
ntpstat
Installing RStudio Server
Make a directory to hold downloaded files.
mkdir Downloads
cd Downloads/
Instructions for RStudio Server are from RStudio Server: Getting Started. (Check for the latest version, which may not be the one listed below.)
wget http://download2.rstudio.org/rstudio-server-0.98.1102-x86_64.rpm
wget http://download2.rstudio.org/rstudio-server-0.98.1103-x86_64.rpm
wget http://download2.rstudio.org/rstudio-server-rhel-0.99.447-x86_64.rpm
Verify checksum, by comparing with value on rstudio.com download page.
md5sum rstudio-server-0.98.1102-x86_64.rpm
md5sum rstudio-server-0.98.1103-x86_64.rpm
md5sum rstudio-server-rhel-0.99.447-x86_64.rpm
Install package.
sudo yum install --nogpgcheck rstudio-server-0.98.1102-x86_64.rpm
sudo yum install --nogpgcheck rstudio-server-0.98.1103-x86_64.rpm
sudo yum install --nogpgcheck rstudio-server-rhel-0.99.447-x86_64.rpm
Adjust Linux firewall to allow access to port 8787, used by RStudio Server.
sudo iptables --line-numbers -n -L
sudo iptables -I INPUT 5 -p tcp -m state --state NEW -m tcp --dport 8787 -j ACCEPT
sudo service iptables save
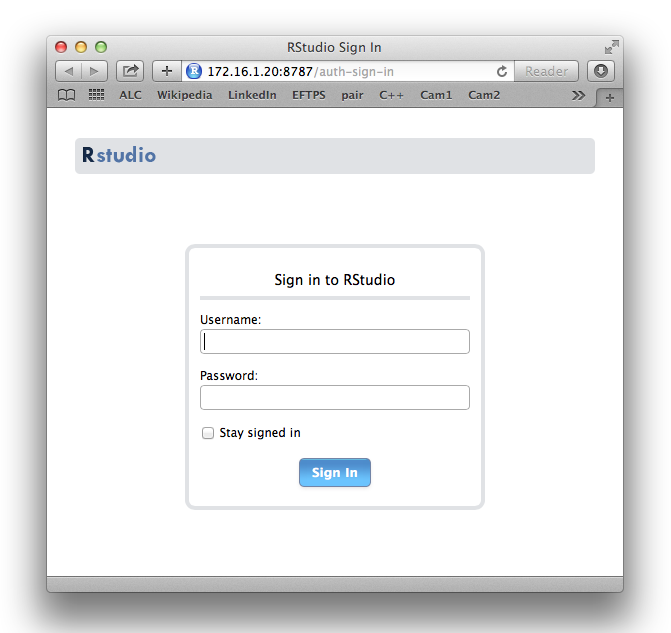
The RStudio Server does not use https:// for its login screen. I decided to add another user, this one without sudo privileges, to use for accessing the R server. Even though I'm on my own private home network, which is itself behind a firewall, I didn't like the idea of sending login info for an administrative account over an unsecured connection.
sudo useradd client
sudo passwd client
Try logging in from my desktop computer using the IP address of the server.
http://172.16.1.20:8787
And it works:
Enable Temperature Monitoring
It's important to keep track of CPU temperatures with a custom build, especially when stress-testing. This sets up temperature-monitoring via a Linux tool. See Part I for potential dangers.
sudo sensors-detect
I bravely hit Enter to use the default for each option
Try out the sensors:
sudo sensors
sudo watch sensors
(Type Control-C when done watching.)
Build and Install WiFi Driver
WiFi did not work out of the box. Type:
lspci
to verify the model of WiFi chip on the motherboard:
03:00.0 Network controller: Broadcom Corporation BCM4352 802.11ac Wireless Network Adapter (rev 03)
I was led to the excellent instructions on the CentOS web site here:
http://wiki.centos.org/HowTos/Laptops/Wireless/Broadcom
And the official Broadcom page here:
http://broadcom.com/support/802.11/linux_sta.php
Note that although the CentOS web page does not list the model BCM4352, that model is listed in Broadcom readme.txt file, which notes that the driver may work with other models as well.
Following the directions, first download the driver.
cd ~/Downloads/
wget http://www.broadcom.com/docs/linux_sta/hybrid-v35_64-nodebug-pcoem-6_30_223_248.tar.gz
Work as root to copy files.
su -
mkdir -p /usr/local/src/hybrid-wl
cd /usr/local/src/hybrid-wl
tar xvfz /home/michael/Downloads/hybrid-v35_64-nodebug-pcoem-6_30_223_248.tar.gz
chown -R michael /usr/local/src/hybrid-wl
exit
Build the driver. This will produce some errors and warning, exactly as predicted by the CentOS instructions. Make sure only the expected problems are reported, then carry on.
cd /usr/local/src/hybrid-wl
make -C /lib/modules/`uname -r`/build/ M=`pwd`
Make the patch, build, and copy, as instructed.
sed -i 's/.. KERNEL_VERSION(3, ., .)/>= KERNEL_VERSION(2, 6, 32)/' src/wl/sys/wl_cfg80211_hybrid.c
sed -i 's/.. KERNEL_VERSION(2, 6, 3.)/>= KERNEL_VERSION(2, 6, 32)/' src/wl/sys/wl_cfg80211_hybrid.c
cd /usr/local/src
sudo wget -O wl-kmod-fix-ioctl-handling.patch "http://wiki.centos.org/HowTos/Laptops/Wireless/Broadcom?action=AttachFile&do=get&target=wl-kmod-fix-ioctl-handling.patch"
cd hybrid-wl/
patch -p1 < ../wl-kmod-fix-ioctl-handling.patch
make -C /lib/modules/`uname -r`/build/ M=`pwd`
strip --strip-debug wl.ko
sudo cp -vi /usr/local/src/hybrid-wl/wl.ko /lib/modules/`uname -r`/extra/
cd /usr/local/src/hybrid-wl
Add driver module to kernel.
sudo depmod $(uname -r)
sudo modprobe wl
Edit this file:
sudo vi /etc/modprobe.d/blacklist.conf
by appending this at the end:
# more per http://wiki.centos.org/HowTos/Laptops/Wireless/Broadcom
blacklist bcm43xx
blacklist b43
blacklist b43legacy
blacklist bcma
blacklist brcmsmac
blacklist ssb
blacklist ndiswrapper
Restart to verify everything was done correctly.
sudo reboot
Test WiFi with Graphical User Interface
I found it easier to test WiFi by using the graphical user interface (GUI). Log in as the administrative user ("michael" in my case), on the monitor and keyboard directly connected to new system. Type the following to start the GUI.
startx
Right-click network icon in the menu bar, towards the right.
Check the box to Enable Wireless.
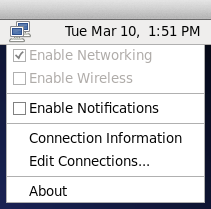
Click the network icon again. A list of nearby wireless networks should appear. Pick one to log in and verify that WiFi is working.
When done, right-click the network icon and uncheck Enable Wireless to disable WiFi.
Add Repository and Install Sensor Applet
I followed the instructions on the CentOS site for Installing RPMForge. This repository will be used here and later.
sudo rpm --import http://apt.sw.be/RPM-GPG-KEY.dag.txt
cd ~/Downloads/
wget http://pkgs.repoforge.org/rpmforge-release/rpmforge-release-0.5.3-1.el6.rf.x86_64.rpm
rpm -K rpmforge-release-0.5.3-1.el6.rf.*.rpm
The response to rpm -K should be something reassuring. Continue with the installation:
sudo rpm -i rpmforge-release-0.5.3-1.el6.rf.*.rpm
Install gnome-applet-sensors, a handy applet that shows the current CPU temperatures in the menu bar of the graphical user interface.
sudo yum install gnome-applet-sensors
Start the GUI.
startx
Set up the applet.
- Right-click in the middle of menu bar.
- Choose "Add to panel..."
- Select "Hardware sensors monitor." Click Add, then Close.
- Right-click a temperature in the menu bar, choose Preferences.
- Next to Display > "Display sensors in panel as" select "label with value."
- Select the Sensors tab. Click the disclosure triangles to show all the sensors.
- Uncheck all but the "Core N" rows under libsensors.
- Click the labels and change to shorter text, e.g., "c1:"
Install Prime95 Stress-testing Tool
Download and unpack Prime95 (mprime) version 26.6. A post elsewhere says, "Do NOT use any Prime95 versions later than 26.6."
cd ~
mkdir mprime
cd mprime
wget http://www.mersenne.org/ftp_root/gimps/p95v285.linux64.tar.gz
tar zxvf p95v285.linux64.tar.gz
Documentation is at CPU Stress / Torture Testing. To start:
cd ~/mprime
./mprime
Use Control-C to stop.
Do not run without monitoring temperature. The Intel Temperature Guide on tomshardware.com is useful reading.
Install Linpack Testing Tool (Optional)
So this may have been a mistake, at least for thermal testing.
I did like running Linpack because it gave a GFLOPS estimate for each test, and there's a version for Max OS X as well. Use at your own risk.
Install the Linpack tool from Intel.
cd ~
mkdir linpack
cd linpack
wget http://registrationcenter.intel.com/irc_nas/5232/l_lpk_p_11.2.2.010.tgz
tar zxvf l_lpk_p_11.2.2.010.tgz
To run Linpack:
cd l_lpk_p_11.2.2.010/linpack_11.2.2/benchmarks/linpack
./runme_xeon64
Use Control-C to stop.
VNC Server Installation and Setup
I mostly followed the instructions on CentOS wiki at VNC (Virtual Network Computing), with a few additions that appeared advisable.
Adjust Linux firewall to allow access to ports used by VNCServer.
sudo iptables --line-numbers -n -L
sudo iptables -I INPUT 6 -p tcp -m state --state NEW -m tcp -m multiport --dports 5901:5903,6001:6003 -j ACCEPT
sudo service iptables save
I opted for a non-encrypted configuration and only allowed the unprivileged user "client" VNC access. Edit the vncservers file to add users and screen sizes:
sudo vi /etc/sysconfig/vncservers
by appending at end:
VNCSERVERS="1:client"
VNCSERVERARGS[1]="-geometry 1024x768"
Add the name of server (as chosen during installation) to the hosts file. This seemed to be necessary to prevent complaints of "bad display name" when starting up the VNC server. Due to a lack of imagination, I named the server "corsair" because that was the name on the front of the case.
sudo vi /etc/hosts
Change the existing lines to:
127.0.0.1   localhost localhost.localdomain localhost4 localhost4.localdomain4 corsair
::1         localhost localhost.localdomain localhost6 localhost6.localdomain6 corsair
Add a VNC password for user "client"; this can be different from the login password.
su - client
vncpasswd
cd .vnc
ls
exit
Start the VNC server.
sudo /sbin/service vncserver start
Set the VNC server to start automatically at boot.
sudo /sbin/chkconfig vncserver on
I used Chicken of the VNC (CotVNC) as a VNC client on the Mac. CotVNC has apparently been superceded by Chicken, which still has the same charming icon:

When opening a connection with CotVNC, the Display number in the dialog box corresponds to the configuration numbers in the /etc/sysconfig/vncservers file. So to use VNCSERVERARGS[1]="-geometry 1024x768" specify display 1.
After VNC access had been verified to work, there was one remaining irritation to be fixed. This dialog kept popping up on the virtual screen in CotVNC:
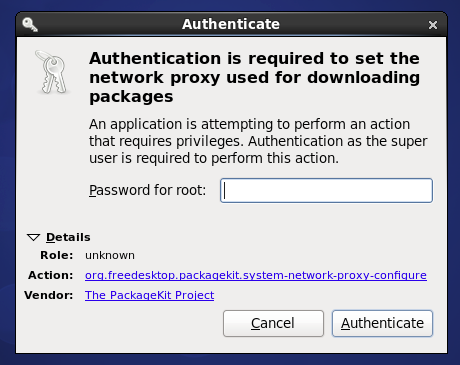
I found the suggestion here to work:
- Open a terminal window by choosing Applications > System Tools > Terminal.
- Type:
gnome-session-properties - Scroll through the list and uncheck "PackageKit Update Applet."
- Click Close
Beep Installation and Setup
Since the system would normally be starting up without a monitor, I wanted it to beep when it was done booting, to tell me it was ready for use.
Install the beep command.
sudo yum install beep
sudo chmod 4755 /usr/bin/beep
Edit this file to permit beeping:
sudo vi /etc/modprobe.d/blacklist.conf
by commenting-out the blacklist line for the computer speaker:
# sound drivers
# blacklist snd-pcsp
The rc.local script is run at the end of the boot process. Edit it:
sudo vi /etc/rc.local
by appending this (or another melody) at the end:
beep -D 50 -f 329.6 -l 300 -n -D 50 -f 349.2 -l 100 -n -D 50 -f 392.0 -l 200 -n -D 50 -f 523.2 -l 800
Fix Sound
Sound playback through the headphone jack is crackly, static-y, scratchy, noisy, and/or skipping unless the following change is made.
In a later section I list some things I tried for this that didn't work.
Create a file:
sudo vi /etc/modprobe.d/alsa-base.conf
that contains:
options snd-hda-intel snoop=0 model=auto
Restart.
sudo reboot
To test, first prepare a flash drive that contains a song in AIFF format. (iTunes can export this format.) Then, start the GUI at a monitor and keyboard connected directly to the system.
startx
Copy the song.aif file into the Music folder in the Home folder.
Start the Rhythmbox application by choosing Applications > Sound & Video > Rhythmbox Music Player.
Click the Rhythmbox icon in the menu bar:
Ignore any warnings that say "Unable to activate plugin Magnatune Store." Choose Music > Import File... in the Rhythmbox Player. After the song is imported, select it song and click Play.
Benchmarks and Testing
R Benchmark
R benchmarks are discussed here. I used R-benchmark-25.R, which seemed convenient and commonly-used.
     Warning messages:

     1: In remove("a", "b") : object 'a' not found

     2: In remove("a", "b") : object 'b' not found
Didn't seem to harm anything, and I haven't tracked it down yet. I suspect it's just additional error-checking introduced in R since the benchmark was last updated in 2008.
Here's the full output when using R 3.1.2 on a Mid-2010 Mac Pro (2.8 GHz Quad Core Xeon, 32GB RAM) running OS X 10.9:
   R Benchmark 2.5
   ===============
Number of times each test is run__________________________:  3

   I. Matrix calculation
   ---------------------
Creation, transp., deformation of a 2500x2500 matrix (sec):  1.09566666666666
2400x2400 normal distributed random matrix ^1000____ (sec):  0.571333333333333
Sorting of 7,000,000 random values__________________ (sec):  0.944999999999998
2800x2800 cross-product matrix (b = a' * a)_________ (sec):  13.0896666666667
Linear regr. over a 3000x3000 matrix (c = a \ b')___ (sec):  6.20833333333333
                      --------------------------------------------
                 Trimmed geom. mean (2 extremes eliminated):  1.85935262619312

   II. Matrix functions
   --------------------
FFT over 2,400,000 random values____________________ (sec):  0.498333333333335
Eigenvalues of a 640x640 random matrix______________ (sec):  1.14233333333334
Determinant of a 2500x2500 random matrix____________ (sec):  5.67833333333333
Cholesky decomposition of a 3000x3000 matrix________ (sec):  4.75500000000001
Inverse of a 1600x1600 random matrix________________ (sec):  4.81133333333333
                      --------------------------------------------
                Trimmed geom. mean (2 extremes eliminated):  2.96758344103999

   III. Programmation
   ------------------
3,500,000 Fibonacci numbers calculation (vector calc)(sec):  0.383666666666651
Creation of a 3000x3000 Hilbert matrix (matrix calc) (sec):  0.318000000000003
Grand common divisors of 400,000 pairs (recursion)__ (sec):  1.07399999999999
Creation of a 500x500 Toeplitz matrix (loops)_______ (sec):  0.434333333333332
Escoufier's method on a 45x45 matrix (mixed)________ (sec):  0.517999999999972
                      --------------------------------------------
                Trimmed geom. mean (2 extremes eliminated):  0.441945785326949


Total time for all 15 tests_________________________ (sec):  41.5233333333333
Overall mean (sum of I, II and III trimmed means/3)_ (sec):  1.34599846842448
                      --- End of test ---
Results on a Late-2012 Mac Mini (2.5 GHz Intel Core i5, 4GB RAM) running OS X 10.10 were slightly better:
   R Benchmark 2.5
   ===============
Number of times each test is run__________________________:  3

   I. Matrix calculation
   ---------------------
Creation, transp., deformation of a 2500x2500 matrix (sec):  1.144
2400x2400 normal distributed random matrix ^1000____ (sec):  0.273333333333336
Sorting of 7,000,000 random values__________________ (sec):  0.833333333333333
2800x2800 cross-product matrix (b = a' * a)_________ (sec):  12.8923333333333
Linear regr. over a 3000x3000 matrix (c = a \ b')___ (sec):  6.18833333333333
                      --------------------------------------------
                 Trimmed geom. mean (2 extremes eliminated):  1.80692236107856

   II. Matrix functions
   --------------------
FFT over 2,400,000 random values____________________ (sec):  0.528000000000001
Eigenvalues of a 640x640 random matrix______________ (sec):  0.99866666666667
Determinant of a 2500x2500 random matrix____________ (sec):  4.707
Cholesky decomposition of a 3000x3000 matrix________ (sec):  5.01466666666666
Inverse of a 1600x1600 random matrix________________ (sec):  4.03833333333334
                      --------------------------------------------
                Trimmed geom. mean (2 extremes eliminated):  2.66760980760789

   III. Programmation
   ------------------
3,500,000 Fibonacci numbers calculation (vector calc)(sec):  0.369666666666679
Creation of a 3000x3000 Hilbert matrix (matrix calc) (sec):  0.288666666666643
Grand common divisors of 400,000 pairs (recursion)__ (sec):  1.04699999999999
Creation of a 500x500 Toeplitz matrix (loops)_______ (sec):  0.406000000000006
Escoufier's method on a 45x45 matrix (mixed)________ (sec):  0.493999999999971
                      --------------------------------------------
                Trimmed geom. mean (2 extremes eliminated):  0.420101686137174


Total time for all 15 tests_________________________ (sec):  39.2233333333333
Overall mean (sum of I, II and III trimmed means/3)_ (sec):  1.26514044796132
                      --- End of test ---
And results for the new Z97i-Plus system (2.8 GHz Celeron G1840, 16GB RAM) running CentOS 6.6 were even better than that:
   R Benchmark 2.5
   ===============
Number of times each test is run__________________________:  3

   I. Matrix calculation
   ---------------------
Creation, transp., deformation of a 2500x2500 matrix (sec):  0.981000000000004
2400x2400 normal distributed random matrix ^1000____ (sec):  0.695333333333338
Sorting of 7,000,000 random values__________________ (sec):  0.809666666666667
2800x2800 cross-product matrix (b = a' * a)_________ (sec):  12.0696666666667
Linear regr. over a 3000x3000 matrix (c = a \ b')___ (sec):  5.88700000000001
                      --------------------------------------------
                 Trimmed geom. mean (2 extremes eliminated):  1.6722059629531

   II. Matrix functions
   --------------------
FFT over 2,400,000 random values____________________ (sec):  0.34633333333331
Eigenvalues of a 640x640 random matrix______________ (sec):  0.933333333333337
Determinant of a 2500x2500 random matrix____________ (sec):  4.07633333333335
Cholesky decomposition of a 3000x3000 matrix________ (sec):  4.92966666666666
Inverse of a 1600x1600 random matrix________________ (sec):  3.45566666666665
                      --------------------------------------------
                Trimmed geom. mean (2 extremes eliminated):  2.36018531338375

   III. Programmation
   ------------------
3,500,000 Fibonacci numbers calculation (vector calc)(sec):  0.677999999999997
Creation of a 3000x3000 Hilbert matrix (matrix calc) (sec):  0.160333333333313
Grand common divisors of 400,000 pairs (recursion)__ (sec):  0.971000000000004
Creation of a 500x500 Toeplitz matrix (loops)_______ (sec):  0.348666666666645
Escoufier's method on a 45x45 matrix (mixed)________ (sec):  0.478999999999985
                      --------------------------------------------
                Trimmed geom. mean (2 extremes eliminated):  0.483791847519441


Total time for all 15 tests_________________________ (sec):  36.8209999999999
Overall mean (sum of I, II and III trimmed means/3)_ (sec):  1.24059913020957
                      --- End of test ---
For fun, I tried the benchmark on an circa-2008 Asus EeePC 1000H Netbook (1.6 GHz Intel Atom N270) and got this:
Total time for all 15 tests_________________________ (sec):  297.214333333334
Overall mean (sum of I, II and III trimmed means/3)_ (sec):  9.97500132596311
So at least performance had the proper slope as a function of age-of-machine, and I had reason to look forward to more improvement on upgrading to a i7-4790K.
(I was a little perturbed by the relatively poor performance of the "2800x2800 cross-product matrix" test, however. That throws off the scaling of the tests; it disproportionally contributes to the total time and is ignored in the trimmed geometric mean.)
People have done work trying different libraries, R versions, compilers, etc. in order to improve R performance, but at this point I was mainly interested in roughly comparing different hardware environments. I used the standard R binaries, plus the packages required to run the benchmark. The numbers here may not compare directly with numbers found elsewhere.
Prime95 / mprime
I thought I'd give Prime95 a try with my new build, since that's what all the other kids do. (I started off using mprime version 28.5, instead of the recommended 26.6, but no harm was done to the Celeron.)
I started mprime Torture Test #1:
1 = Small FFTs (maximum heat and FPU stress, data fits in L2 cache, RAM
not tested much).
The core temperature started climbing from about 34°C at idle, and reached a stable temp of 53°C after about 15 minutes. Not bad, looks like the stock fan deserves a little more respect.
According to the Intel site, Tcase Max for the Celeron G1840 is 72°C. Intel's Processor Operation Temperature FAQ defines Tcase Max and Tjunction Max. Tjunction is the core temperature. Tcase isn't, but that's what they give you in the specs. There is discussion and confusion about the relation between Tcase and Tjunction. It is often said that Tjunction is about 15 C° higher than Tcase. The Temperature Guide on tomshardware.com says to use an offset of 5 C°. In either case, a Tjunction of 53°C is quite a moderate value.
Linpack
Some people like Linpack for stress-testing and some people say not to use it. Here are some results when I tried it with the Celeron:
Intel(R) Optimized LINPACK Benchmark data

Current date/time: Fri Feb 27 11:57:57 2015

CPU frequency:    2.798 GHz
Number of CPUs: 1
Number of cores: 2
Number of threads: 2

Parameters are set to:

Number of tests: 15
Number of equations to solve (problem size) : 1000  2000  5000  10000 15000 18000 20000 22000 25000 26000 27000 30000 35000 40000 45000
Leading dimension of array                  : 1000  2000  5008  10000 15000 18008 20016 22008 25000 26000 27000 30000 35000 40000 45000
Number of trials to run                     : 4     2     2     2     2     2     2     2     2     2     1     1     1     1     1
Data alignment value (in Kbytes)            : 4     4     4     4     4     4     4     4     4     4     4     1     1     1     1

Maximum memory requested that can be used=16200901024, at the size=45000

=================== Timing linear equation system solver ===================

Size   LDA    Align. Time(s)    GFlops   Residual     Residual(norm) Check
1000   1000   4      0.038      17.7018  9.419757e-13 3.212379e-02   pass
1000   1000   4      0.037      17.9113  9.419757e-13 3.212379e-02   pass
1000   1000   4      0.037      17.8975  9.419757e-13 3.212379e-02   pass
1000   1000   4      0.037      17.8956  9.419757e-13 3.212379e-02   pass
2000   2000   4      0.281      18.9872  4.657913e-12 4.051814e-02   pass
2000   2000   4      0.281      18.9897  4.657913e-12 4.051814e-02   pass
5000   5008   4      4.073      20.4726  3.111936e-11 4.339344e-02   pass
5000   5008   4      4.062      20.5264  3.111936e-11 4.339344e-02   pass
10000  10000  4      31.875     20.9211  9.915883e-11 3.496441e-02   pass
...
Once again, core temperatures reached 53°C after about 10 minutes.
There's a Mac OS X version. Here are some results for the 2010 Mac Pro:
Intel(R) Optimized LINPACK Benchmark data

Current date/time: Wed Mar  4 15:04:59 2015

CPU frequency:    3.057 GHz
Number of CPUs: 1
Number of cores: 4
Number of threads: 8

Parameters are set to:

Number of tests: 9
Number of equations to solve (problem size) : 15000 14000 13000 12000 11000 10000 8000  6000  1000
Leading dimension of array                  : 15000 14008 13000 12008 11000 10008 8008  6008  1000
Number of trials to run                     : 1     2     2     2     2     2     2     3     4
Data alignment value (in Kbytes)            : 4     4     4     4     4     4     4     4     4

Maximum memory requested that can be used=1800304096, at the size=15000

=================== Timing linear equation system solver ===================

Size   LDA    Align. Time(s)    GFlops   Residual     Residual(norm) Check
15000  15000  4      65.338     34.4433  2.298756e-10 3.620579e-02   pass
14000  14008  4      55.137     33.1853  1.953428e-10 3.527683e-02   pass
14000  14008  4      52.951     34.5551  1.953428e-10 3.527683e-02   pass
...
Things That Didn't Work When I Tried Them
Fan sensors
While it was straightforward for sensors-detect to report on the temperature sensors, it did not give access to the fan speed sensors. This information is available if you use Windows and install the utilities Asus supplies on CD with motherboard, so it seemed like it might just be a driver problem.
The chip on the motherboard that does the monitoring is the Nuvoton NCT5538D. This is believed to be compatible with the driver available here. There are reports of success in using this approach on a similar board and different distro; after an hour of messing around, however, I decided not to spend any more time on it for now.
Use WINE with Asus Windows Utilities
I still wanted to get at the fan speeds, so for completeness, I decided to try out the Asus Windows utilities via the WINE compatibility layer. WINE is an application sometimes allows unmodified Windows binaries to run on Linux. I was able to install WINE, and I tried it out by using the Windows version of FireFox. It worked! Impressive! Unfortunately, the Asus utilities just threw errors when I tried to install or run them.
I didn't really expect this trick to work, but it would have been so great if had.
Samba with SELinux
I thought I would install Samba by following the instructions here so I could have convenient access to files via the OS X Finder on my desktop computer. I ended up getting bogged down in SELinux pain points when things started breaking elsewhere after I followed the directions. I was not interested in becoming an SELinux expert so (with a slightly guilty conscience) I just disabled it, but that was not entirely satisfactory either, so I stopped working on the installation.
I decided it was simpler to just use sftp from the Mac command line if necessary. If that becomes bothersome, I can try something like Cyberduck to put a GUI on top of Mac OS X's sftp.
For going the other way, there's already a convenient interface in the CentOS GUI (Gnome), as long as "Remote Login" has been enabled in Sharing under OS X System Preferences. Start the Linux GUI:
startx
And then:
- Choose Applications > System Tools > File Browser.
- In the File Browser, choose File > Connect to Server...
- For "Service type" choose SSH.
- Enter the IP address of the desktop Mac.
- Enter the User name.
Sound Fixes
The scratchy-sound problem had many online suggestions for fixes. Most of the suggestions did not help. They included:
- Variations on the string to include in
/etc/modprobe.d/alsa-base.conf - Editing various lines in
/etc/pulse/default.paby addingtsched=0 - Turning off "Internal Audio HDMI" in System > Preferences > Sound > Hardware
- Disabling Auto-Mute in
alsa-mixer
The post that finally steered me in the right direction was this one.
What's Next
Part III: Leveling Up will discuss the upgrading of the CPU, CPU cooler, and case fan.