Personal Linux R Server (Part V: 2017 Software Update)
Introduction
In the two years since I documented the build of my Personal Linux R Server in a Mini-ITX Gaming Case there have been changes in my software configuration. I wanted to be able to run multiple operating systems, and some software sources have become deprecated. Enough has changed so that setup procedures documented here:
are no longer a reliable guide. This post describes my current installation protocol as of mid-2017.
Contents
- CentOS 6.9
- Install from CD
- Getting Started
- Installing Packages
- Enabling Time Synchronization
- Installing RStudio Server
- Enable Temperature Monitoring
- Build and Install WiFi Driver
- Test WiFi with Graphical User Interface
- Install Prime95 Stress-testing Tool
- Install Linpack Testing Tool
- VNC Server Installation and Setup
- Beep Installation and Setup
- Graphics Card Installation and Setup
- Benchmarks and Testing
- R Benchmark
- OpenBLAS
- OpenCL SDK
- Installation of clBLAS
- Installation of multiblas R Package
- CentOS 7.3
- Install from CD
- Getting Started
- Installing Packages
- Enabling Time Synchronization
- Installing RStudio Server
- Enable Temperature Monitoring
- Build and Install WiFi Driver
- Test WiFi with Graphical User Interface
- Install Prime95 Stress-testing Tool
- Install Linpack Testing Tool
- VNC Server Installation and Setup
- Beep Installation and Setup
- Graphics Card Installation and Setup
- R Benchmark
- OpenBLAS
Hardware
The hardware choices and assembly are described in detail in Part I, Part III and Part IV of the original series of posts. The primary components are:
| Case | Corsair 250D Mini ITX PC Case |
|---|---|
| Power Supply | Corsair RM550, 550 Watt, Fully Modular, Gold Certified |
| Motherboard | Asus Z97i-Plus |
| Processor | Intel Core i7-4790K 4.0 GHz, 8M Cache |
| RAM | Crucial Ballistix Sport 16GB Kit (8GBx2) 1600 MHz DDR3 |
| Hard Drive | WD Black 2TB - 7200 RPM SATA 6 Gb/s 64MB Cache 3.5 Inch WD2003FZEX |
| Video Card | Sapphire Radeon R9 280 |
Note that some of these are no longer available or have newer equivalents.
The only change since the original description was the addition of a solid state drive:
| SSD | Samsung 850 EVO 500GB 2.5-Inch SATA III Internal SSD |
|---|
Triple Booting
I was interested in running three different operating systems:
- SteamOS
- CentOS 6.9
- CentOS 7.3
SteamOS is a Debian-based linux system for games.
CentOS 6.9 is the latest version of CentOS that allows for installation of the proprietary AMD video driver for the R9 280. This driver is needed to use OpenCL to access the GPU for general-purpose computation.
CentOS 7.3 is the latest version of CentOS to date. At present, it does not appear to be possible to install the proprietary AMD driver. The system does include an open-source video driver that allows the video card to be used for display but does not provide for OpenCL access.
I was able to obtain easy triple-booting only when I installed the operating systems in the exact order shown above. I suspect someone who was more familiar with the GRUB bootloader might have had an easier time of it. The stumbling block for me was that the CentOS 6 installer uses the legacy version of GRUB, while CentOS 7 uses the current GRUB version 2.
When CentOS 7 is installed last, GRUB gives access to all 3 operating systems at boot time. When CentOS 6 updates its kernel, however, it is unable to automatically update the bootloader configuration files to account for the change. I found it necessary to switch to CentOS 7 (after a CentOS 6 kernel update) and force an update of GRUB settings from CentOS 7, in order for the bootloader to continue to perform correctly.
To force bootloader update, type the following in the CentOS 7 installation:
sudo grub2-mkconfig -o /boot/grub2/grub.cfg
sudo reboot
After rebooting into CentOS 7, reboot into CentOS 6 and verify that the correct kernel is in use:
uname -r
rpm -q kernel
SteamOS
Download SteamOS from here and install.
Enable desktop access by choosing: Gear icon -> Display -> Interface, and check "Enable access to the Linux desktop." Enter desktop by choosing: Power On/Off icon > Switch to Desktop mode.
Fix terminal access by following instructions from here:
- Choose: Home > Computer launch /usr/bin/xterm
- Type:
localectl set-locale LANG="en_US.UTF-8"
sudo reboot
Opt into the SteamOS beta program:
sudo apt-get install steamos-beta-repo
sudo reboot
Repeat the terminal-access fix.
Switch the graphics driver to Mesa by following the instructions here and reboot.
The latest mesa driver [mesa 17.x] now includes functionality for TressFX! Download Tomb Raider, change the graphics choice to Ultimate (Options -> Graphics -> Advanced tab > Quality: Ultimate) and enjoy. I obtained the following benchmark performance for this setting on the i7-4790K with R9 280 card:
| Minimum | 30.6 fps |
|---|---|
| Maximum | 49.8 fps |
| Average | 40.8 fps |
The Stanley Parable Demo does not start with the above configuration. The fix proposed here worked for me:
rm ~/.local/share/Steam/steamapps/common/The\ Stanley\ Parable/bin/libstdc++.so.6
CentOS 6.9
[C6] Install from CD
Before beginning, set up the computer to use the motherboard video output (not the graphics card output):
- Reboot and hit F2 to get BIOS setup screen.
- Choose the Advanced tab.
- Choose System Agent Configuration.
- Choose Graphics Configuration.
- For the item labeled "Primary Display" choose "CPU Graphics."
- For the item labeled "CPU Graphics Multi Monitor" choose Enabled.
Download the CentOS 6.9 Minimal Install ISO (x86_64), and burn the iso to a CD.
Boot from the CD and install the minimal system. Set up network connection and time zone during installation.
Make note of the root partition defined during installation, e.g., /dev/sda14.
[C6] Getting Started
Log in as root. The network needs to be turned on, as it is not initially active.
ifup eth0
This tests the network connection and updates everything in the minimal system.
yum update
Set the network to turn on automatically at startup, by editing:
vi /etc/sysconfig/network-scripts/ifcfg-eth0
and changing the appropriate line to
ONBOOT=yes
Add a user in the wheel group.
useradd michael
passwd michael
usermod -a -G wheel michael
Give members of the wheel group sudo privileges:
visudo
by uncommenting the appropriate line
## Allows people in group wheel to run all commands
%wheel  ALL=(ALL)       ALL
Restart, to verify the above steps.
reboot
[C6] Installing Packages
Log in from desktop machine via ssh as user.
ssh michael@172.16.1.20
Switch to root, to avoid repeated typing of sudo.
su -
Install packages.
yum -y groupinstall "Development tools"
yum -y groupinstall "X Window System"
yum -y groupinstall "Desktop"
yum -y groupinstall "Fonts"
yum -y groupinstall "General Purpose Desktop"
yum -y groupinstall "Graphical Administration Tools"
yum -y groupinstall "Graphics Creation Tools"
yum -y groupinstall "Internet Browser"
yum -y groupinstall "Office Suite and Productivity"

yum -y install lm_sensors
yum -y install epel-release
yum -y install hddtemp

yum -y install R
yum -y install openssl098e

yum -y install tigervnc-server

yum -y install wget
yum -y install zip
yum -y install unzip
Return to user account.
exit
[C6] Enabling Time Synchronization
Start package for synchronization to external time servers:
sudo yum install ntp
sudo chkconfig ntpd on
sudo ntpdate pool.ntp.org
sudo service ntpd start
Verify synchronization is working:
ntpstat
[C6] Installing RStudio Server
Make a directory to hold downloaded files.
cd ~
mkdir Downloads
cd Downloads/
Verify the current version of RStudio Server here.
wget https://download2.rstudio.org/rstudio-server-rhel-1.0.143-x86_64.rpm
Verify checksum, by comparing with value on the download page.
md5sum rstudio-server-rhel-1.0.143-x86_64.rpm
Install package.
sudo yum install --nogpgcheck rstudio-server-rhel-1.0.143-x86_64.rpm
Adjust Linux firewall to allow access to port 8787, used by RStudio Server.
sudo iptables --line-numbers -n -L
sudo iptables -I INPUT 5 -p tcp -m state --state NEW -m tcp --dport 8787 -j ACCEPT
sudo service iptables save
Add a non-administrative user for accessing the R server, because the server does not use https:// for its login screen.
sudo useradd client
sudo passwd client
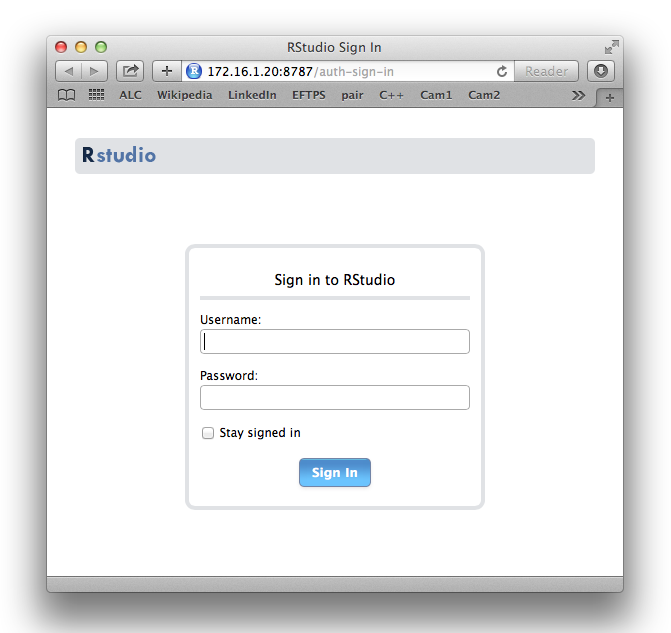
Try logging in from another computer using the IP address of the server.
http://172.16.1.20:8787
This should appear:
[C6] Enable Temperature Monitoring
It's important to keep track of CPU temperatures with a custom build, especially when stress-testing. This sets up temperature-monitoring via a Linux tool. See Part I for potential dangers.
sudo sensors-detect
Hit Enter to use the default for each option
Try out the sensors:
sudo sensors
sudo watch sensors
(Type Control-C when done watching.)
[C6] Build and Install WiFi Driver
WiFi does not work out of the box. Type:
sudo yum install pciutils
lspci
to verify the model of WiFi chip on the motherboard:
03:00.0 Network controller: Broadcom Corporation BCM4352 802.11ac Wireless Network Adapter (rev 03)
Follow the instructions on the CentOS web site here:
http://wiki.centos.org/HowTos/Laptops/Wireless/Broadcom
And refer to the Release Notes on the Broadcom page here:
http://broadcom.com/support/802.11/linux_sta.php
Note that although the CentOS web page does not list the model BCM4352, that model is listed in Broadcom README file which is downloadable here.
Following the directions, first download the driver. This needs to be done via the GUI, since it requires clicking through a license agreement on the web pag. Start the GUI:
startx
Launch the browser and go to the web page.
In the driver section, select Linux® STA 64-bit driver, and download it to the ~/Downloads directory.
Then, work as root to copy the files.
su -
mkdir -p /usr/local/src/hybrid-wl
cd /usr/local/src/hybrid-wl
tar xvfz /home/michael/Downloads/hybrid-v35_64-nodebug-pcoem-6_30_223_271.tar.gz
chown -R michael /usr/local/src/hybrid-wl
exit
Build the driver. This will produce some errors and warning, as predicted by the CentOS instructions.
cd /usr/local/src/hybrid-wl
make -C /lib/modules/`uname -r`/build/ M=`pwd`
Patch, build, and copy, as instructed:
sed -i 's/[ >][>=] KERNEL_VERSION(2, 6, 3.)/>= KERNEL_VERSION(2, 6, 32)/' src/wl/sys/wl_cfg80211_hybrid.c
sed -i 's/[ >][>=] KERNEL_VERSION(3, ., .)/>= KERNEL_VERSION(2, 6, 32)/' src/wl/sys/wl_cfg80211_hybrid.c
sed -i 's/[ >][>=] KERNEL_VERSION(3, 11, .)/>= KERNEL_VERSION(2, 6, 32)/' src/wl/sys/wl_cfg80211_hybrid.c
sed -i 's/< KERNEL_VERSION(3, 18, .)/< KERNEL_VERSION(2, 6, 30)/' src/wl/sys/wl_cfg80211_hybrid.c
sed -i 's/[ >][>=] KERNEL_VERSION(3, 15, .)/>= KERNEL_VERSION(2, 6, 32)/' src/wl/sys/wl_cfg80211_hybrid.c
sed -i 's/[ >][>=] KERNEL_VERSION(4, 0, 0)/>= KERNEL_VERSION(2, 6, 32)/' src/wl/sys/wl_cfg80211_hybrid.c
sed -i 's/< KERNEL_VERSION(4,2,0)/< KERNEL_VERSION(2, 6, 30)/' src/wl/sys/wl_cfg80211_hybrid.c

cd /usr/local/src
sudo wget -O wl-kmod-fix-ioctl-handling.patch "http://wiki.centos.org/HowTos/Laptops/Wireless/Broadcom?action=AttachFile&do=get&target=wl-kmod-fix-ioctl-handling.patch"

cd hybrid-wl/
patch -p1 < ../wl-kmod-fix-ioctl-handling.patch

make -C /lib/modules/`uname -r`/build/ M=`pwd`

strip --strip-debug wl.ko
sudo cp -vi /usr/local/src/hybrid-wl/wl.ko /lib/modules/`uname -r`/extra/
Add driver module to kernel.
cd /usr/local/src/hybrid-wl
sudo depmod $(uname -r)
sudo modprobe wl
Edit this file:
sudo vi /etc/modprobe.d/blacklist.conf
by appending this at the end:
# more per http://wiki.centos.org/HowTos/Laptops/Wireless/Broadcom
blacklist bcm43xx
blacklist b43
blacklist b43legacy
blacklist bcma
blacklist brcmsmac
blacklist ssb
blacklist ndiswrapper
Restart to verify everything was done correctly.
sudo reboot
[C6] Test WiFi with Graphical User Interface
I found it easier to test WiFi by using the graphical user interface (GUI). Log in as the administrative user ("michael" in my case), on the monitor and keyboard directly connected to new system. Type the following to start the GUI.
startx
Right-click network icon in the menu bar, towards the right.
Check the box to Enable Wireless.
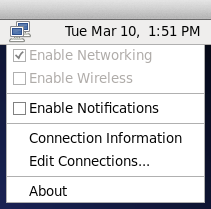
Click the network icon again. A list of nearby wireless networks should appear. Pick one to log in and verify that WiFi is working.
When done, right-click the network icon and uncheck Enable Wireless to disable WiFi.
[C6] Install Prime95 Stress-testing Tool
Download and unpack Prime95 (mprime) version 26.6. A post elsewhere says, "Do NOT use any Prime95 versions later than 26.6."
cd ~
mkdir mprime
cd mprime
wget http://www.mersenne.org/ftp_root/gimps/p95v285.linux64.tar.gz
tar zxvf p95v285.linux64.tar.gz
Documentation is at CPU Stress / Torture Testing. To start:
cd ~/mprime
./mprime
Use Control-C to stop.
Do not run without monitoring temperature. The Intel Temperature Guide on tomshardware.com is useful reading.
[C6] Install Linpack Testing Tool
Install the Linpack tool from Intel.
cd ~
mkdir linpack
cd linpack
wget http://registrationcenter-download.intel.com/akdlm/irc_nas/9752/l_mklb_p_2017.3.017.tgz
tar zxvf l_mklb_p_2017.3.017.tgz
To run Linpack:
cd l_mklb_p_2017.3.017/benchmarks_2017/linux/mkl/benchmarks/linpack
./runme_xeon64
Use Control-C to stop.
Do not run without monitoring temperature. The Intel Temperature Guide states, "Other stability tests such as Linpack and Intel Burn Test have cycles that load all registers with all one's, which is equivalent to a 110% workload, and are also unsuitable for CPU thermal testing."
[C6] VNC Server Installation and Setup
Follow the instructions on CentOS wiki at VNC (Virtual Network Computing), with a few additions.
Adjust Linux firewall to allow access to ports used by VNCServer.
sudo iptables --line-numbers -n -L
sudo iptables -I INPUT 6 -p tcp -m state --state NEW -m tcp -m multiport --dports 5901:5903,6001:6003 -j ACCEPT
sudo service iptables save
Only allow the unprivileged user "client" VNC access. Edit the vncservers file to add users and screen sizes:
sudo vi /etc/sysconfig/vncservers
by appending at end:
VNCSERVERS="1:client"
VNCSERVERARGS[1]="-geometry 1024x768"
Add the name of server (as chosen during installation) to the hosts file. This seems necessary to prevent complaints of "bad display name" when starting up the VNC server.
sudo vi /etc/hosts
Change the existing lines to:
127.0.0.1   localhost localhost.localdomain localhost4 localhost4.localdomain4 corsair
::1         localhost localhost.localdomain localhost6 localhost6.localdomain6 corsair
Add a VNC password for user "client"; this can be different from the login password.
su - client
vncpasswd
cd .vnc
ls
exit
Start the VNC server.
sudo /sbin/service vncserver start
Set the VNC server to start automatically at boot.
sudo /sbin/chkconfig vncserver on
Use Chicken (derived from a previous app named "Chicken of the VNC") as a VNC client on the Mac.
When opening a connection with Chicken, the Display number in the dialog box corresponds to the configuration numbers in the /etc/sysconfig/vncservers file. So to use VNCSERVERARGS[1]="-geometry 1024x768" specify display 1.
To stop this dialog from popping up on the virtual screen in CotVNC:
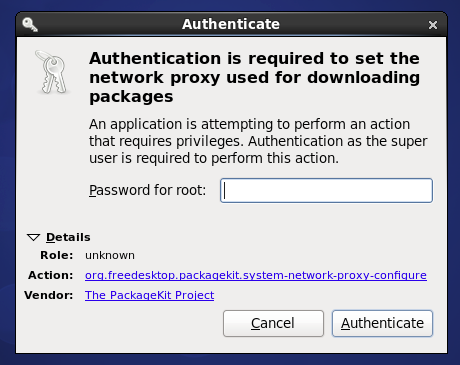
Use the suggestion here:
- Open a terminal window by choosing Applications > System Tools > Terminal.
- Type:
gnome-session-properties - Scroll through the list and uncheck "PackageKit Update Applet."
- Click Close
[C6] Beep Installation and Setup
Install the beep command.
cd ~/Downloads
wget http://www.johnath.com/beep/beep-1.3.tar.gz
Expand, make, and install:
tar xvfz beep-1.3.tar.gz
cd beep-1.3
make

sudo mkdir /usr/man
sudo make install
sudo chmod 4755 /usr/bin/beep
Could not open /dev/tty0 or /dev/vc/0 for writing
open: No such file or directory
Edit this file to permit beeping:
sudo vi /etc/modprobe.d/blacklist.conf
by commenting-out the blacklist line for the computer speaker:
# sound drivers
# blacklist snd-pcsp
The rc.local script is run at the end of the boot process. Edit it:
sudo vi /etc/rc.local
by appending this (or another melody) at the end:
beep -D 50 -f 329.6 -l 300 -n -D 50 -f 349.2 -l 100 -n -D 50 -f 392.0 -l 200 -n -D 50 -f 523.2 -l 800
[C6] Graphics Card Installation and Setup
Use Firefox to get the driver on the AMD site. First, start the GUI:
startx
and then launch FireFox and proceed as follows:
- Go to http://support.amd.com/en-us/download
- Scroll to the section titled, "Manually Select Your Driver."
- For step 1, select Desktop Graphics.
- For step 2, select Radeon R9 Series.
- For step 3, select Radeon R9 2XX Series.
- For step 4, select RHEL x86_64.
- At step 5, click Display Results
- Download "AMD Radeon Software Crimson Edition 15.12 Proprietary RHEL 6.0 x86_64 Display Driver" to your ~/Downloads directory.
- Exit the graphical user interface by choosing System > Logout from the top menu bar.
Install the driver. (First install the dependency "redhat-lsb.")
cd ~/Downloads
sudo yum install redhat-lsb
sudo yum install fglrx64_p_i_c-15.302-1.x86_64_rhel6_64a.rpm
Run the configuration program.
sudo aticonfig --initial
Start the GUI (which will appear on a monitor connected to the graphics card)
startx
and the new software will be available by choosing System > Preferences > AMD Catalyst Control Center.
[C6] R Benchmark
R benchmarks are discussed here. I used R-benchmark-25.R, which is convenient and commonly-used.
cd ~/Downloads
wget http://r.research.att.com/benchmarks/R-benchmark-25.R
R
And then run in R:
source("~/Downloads/R-benchmark-25.R")
[C6] OpenBLAS
The development setup described to this point provides gcc version 4.4.7. OpenBLAS requires gcc version 4.6 or above. Follow these steps (from advice here) to set up devtoolset, which allows switching to an environment with gcc 4.8:
cd /etc/yum.repos.d
sudo wget http://people.centos.org/tru/devtools-2/devtools-2.repo

sudo yum -y install devtoolset-2-gcc
sudo yum -y install devtoolset-2-binutils
sudo yum -y install devtoolset-2-gcc-gfortran
sudo yum -y install devtoolset-2-gcc-c++
To switch into the environment:
scl enable devtoolset-2 bash
To leave the environment:
exit
Default build
Download and build OpenBLAS with default options:
cd ~
mkdir OpenBLAS
cd OpenBLAS/
wget https://github.com/xianyi/OpenBLAS/archive/v0.2.19.zip
unzip v0.2.19
cd OpenBLAS-0.2.19
scl enable devtoolset-2 bash
make
sudo mkdir /usr/lib64/openblas
sudo make PREFIX=/usr/lib64/openblas install
exit
Switching
To prepare to use different versions of BLAS, rename the reference library and set up a symbolic link:
sudo mv /usr/lib64/R/lib/libRblas.so /usr/lib64/R/lib/libRblas.ref.so
sudo ln -sf /usr/lib64/R/lib/libRblas.ref.so /usr/lib64/R/lib/libRblas.so
We can now switch back and forth between the reference BLAS library and OpenBLAS:
# for OpenBLAS use
cd /usr/lib64/R/lib
sudo ln -sf /usr/lib64/openblas/lib/libopenblas.so libRblas.so

# for R reference BLAS use
cd /usr/lib64/R/lib
sudo ln -sf libRblas.ref.so libRblas.so
[C6] OpenCL SDK
Use Firefox to get the SDK on the AMD site. First, start the GUI:
startx
and then launch FireFox and proceed as follows:
- Go to http://developer.amd.com/tools-and-sdks/opencl-zone/amd-accelerated-parallel-processing-app-sdk/
- Under "Downloads", click the link for AMD APP SDK 3.0 for 64-bit Linux.
- Click through the license agreement.
- Download the file AMD-APP-SDKInstaller-v3.0.130.136-GA-linux64.tar.bz2
- Exit the graphical user interface by choosing System > Logout from the top menu bar.
Following the installation notes, enter the following in the terminal:
cd ~/Downloads
tar -xvjf AMD-APP-SDKInstaller-v3.0.130.136-GA-linux64.tar.bz2
sudo  ./sudo ./AMD-APP-SDK-v3.0.130.136-GA-linux64.sh

sudo reboot
Try some samples:
cd /opt/AMDAPPSDK-3.0/samples/opencl/bin/x86_64
./HelloWorld
./MatrixMulDouble
[C6] Installation of clBLAS
Download, expand, and copy the clBLAS library binary. There are many versions later than 2.4.0, but they seem to have compatibility problems with CentOS 6.
cd ~
mkdir clblas
cd ~/clblas
wget https://github.com/clMathLibraries/clBLAS/releases/download/v2.4/clBLAS-2.4.0-Linux-x64.tar.gz
tar -zxvf clBLAS-2.4.0-Linux-x64.tar.gz
sudo mv clBLAS-2.4.0-Linux-x64 /opt
Create a file to add clblas to the library search path:
sudo sh -c 'echo "/opt/clBLAS-2.4.0-Linux-x64/lib64" >> /etc/ld.so.conf.d/clBLAS-2.4.0-Linux-x64.conf'
Rebuild links and cache for shared libraries.
sudo ldconfig
[C6] Installation of multiblas R Package
Download the multiblas package.
cd ~/Downloads
curl -OL https://github.com/quadrivio/multiblas/releases/download/0.91-1/multiblas_0.91-1.tar.gz
Launch R and install package.
setwd("~/Downloads")
Sys.setenv(PKG_CPPFLAGS = "-I/usr/lib64/openblas/include -I/opt/AMDAPPSDK-3.0/include -Dnullptr='NULL' -I/opt/clBLAS-2.4.0-Linux-x64/include")
Sys.setenv(PKG_LIBS = "$(BLAS_LIBS) -L/opt/AMDAPPSDK-3.0/lib/x86_64 -lOpenCL -L/opt/clBLAS-2.4.0-Linux-x64/lib64 -lclBLAS")
install.packages("multiblas_0.91-1.tar.gz", repos = NULL, type = "source")
library(multiblas)
Usage of multiblas
The purpose of this package is to make it easy to compare and use alternate implementations of BLAS matrix-multiplication functions. It is a work in progress.
To test the package with a variety of implementations, create a collection of libraries:
library(multiblas)

# calculate results using simple R code
base <- blas.lib(type="Base")

# calculate results using simple and understandable (but inefficient) C++ code
naive <- blas.lib(type="Naive")

# calculate results using currently-used R BLAS library
rblas <- blas.lib(type="R")

# calculate results using C++ code calling accelerated BLAS library
clib <- blas.lib(type="C")

# calculate results using clBLAS library on GPU
clblas.gpu <- blas.lib(type="clblas", processor="GPU")

# calculate results using clBLAS library on CPU
clblas.cpu <- blas.lib(type="clblas", processor="CPU")

# calculate results using custom OpenCL function on GPU
opencl.gpu <- blas.lib(type="opencl", processor="GPU")

# calculate results using custom OpenCL function on CPU
opencl.cpu <- blas.lib(type="opencl", processor="CPU")

libs <- list(base, naive, rblas, clib, clblas.gpu, clblas.cpu, opencl.gpu, opencl.cpu)
faster.libs <- list(base, rblas, clib, clblas.gpu, clblas.cpu, opencl.gpu, opencl.cpu)
To test the crossprod() and gemm() functions with each implementation in the list:
# single precision crossprod
base$test.crossprod(1024, 1024, libs = libs)

# double precision crossprod
base$test.crossprod(1024, 1024, libs = libs, float = FALSE)


# single precision gemm
base$test.gemm(1024, 1024, 1024, libs = libs)

# double precision gemm
base$test.gemm(1024, 1024, 1024, libs = libs, float = FALSE)
To time the crossprod() and gemm() functions with 3 runs on each implementation in the list:
# single precision crossprod
base$time.crossprod(1024, 1024, libs = libs)

# double precision crossprod
base$time.crossprod(1024, 1024, libs = libs, float = FALSE)


# single precision gemm
base$time.gemm(1024, 1024, 1024, libs = libs)

# double precision gemm
base$time.gemm(1024, 1024, 1024, libs = libs, float = FALSE)

# double precision gemm (big arrays)
base$time.gemm(4096, 4096, 4096, libs = faster.libs, float = FALSE)
To get a list of available OpenCL platforms on the system:
opencl.platforms()
To get a list of available OpenCL devices for a platform:
p <- opencl.platforms()[[1]]
opencl.devices(p)
To print information about an OpenCL device:
p <- opencl.platforms()[[1]]
d <- opencl.devices(p)[[2]]
d$info
CentOS 7.3
[C7] Install from DVD
Before beginning, set up the computer to use the graphics card output:
- Reboot and hit F2 to get BIOS setup screen.
- Choose the Advanced tab.
- Choose System Agent Configuration.
- Choose Graphics Configuration.
- For the item labeled "Primary Display" choose "PCIE Graphics."
- For the item labeled "CPU Graphics Multi Monitor" choose Enabled.
Download the CentOS 7 DVD Install ISO (x86_64), and burn the iso to a DVD.
Boot from the DVD and install the minimal system. Set up network connection, time zone, and user administrative account (e.g., "michael") during installation.
[C7] Getting Started
Log in as root. Type this to test the network connection and update everything in the minimal system:
yum update
Create a mount point for the root partition of the CentOS 6 installation.
(In this example, the partition is /dev/sda14.)
mkdir /root6
mount -t ext4 /dev/sda14 /root6
Copy the ssh keys from the CentOS 6 installation and reboot. This will prevent repeated warnings when using ssh after switching back and forth between CentOS 6 and CentOS 7.
cp -f /root6/etc/ssh/ssh_host* /etc/ssh
reboot
[C7] Installing Packages
Log in from desktop machine via ssh as user.
ssh michael@172.16.1.20
Switch to root, to avoid repeated typing of sudo.
su -
Install packages.
yum -y groupinstall "Development tools"
yum -y groupinstall "Development and Creative Workstation"

yum -y install lm_sensors
yum -y install epel-release
yum -y install hddtemp

yum -y install R
yum -y install openssl098e

yum -y install tigervnc-server

yum -y install wget
yum -y install zip
yum -y install unzip
Return to user account.
exit
[C7] Enabling Time Synchronization
Start package for synchronization to external time servers:
sudo yum install ntp
sudo chkconfig ntpd on
sudo ntpdate pool.ntp.org
sudo service ntpd start
sudo yum install ntp) may not be necessary if ntp was installed from the CD.Verify synchronization is working:
ntpstat
[C7] Installing RStudio Server
Make a directory to hold downloaded files.
cd ~
mkdir Downloads
cd Downloads/
Verify the current version of RStudio Server here.
wget https://download2.rstudio.org/rstudio-server-rhel-1.0.143-x86_64.rpm
Verify checksum, by comparing with value on the download page.
md5sum rstudio-server-rhel-1.0.143-x86_64.rpm
Install package.
sudo yum install --nogpgcheck rstudio-server-rhel-1.0.143-x86_64.rpm
Adjust Linux firewall to allow access to port 8787, used by RStudio Server.
sudo firewall-cmd --permanent --zone=public --add-port=8787/tcp
sudo firewall-cmd --reload
Add a non-administrative user for accessing the R server, because the server does not use https:// for its login screen.
sudo useradd client
sudo passwd client
Try logging in from another computer using the IP address of the server.
http://172.16.1.20:8787
This should appear:
[C7] Enable Temperature Monitoring
It's important to keep track of CPU temperatures with a custom build, especially when stress-testing. This sets up temperature-monitoring via a Linux tool. See Part I for potential dangers.
sudo sensors-detect
Hit Enter to use the default for each option
Try out the sensors:
sudo sensors
sudo watch sensors
(Type Control-C when done watching.)
[C7] Build and Install WiFi Driver
WiFi does not work out of the box. Type:
sudo yum install pciutils
lspci
to verify the model of WiFi chip on the motherboard:
03:00.0 Network controller: Broadcom Corporation BCM4352 802.11ac Wireless Network Adapter (rev 03)
Follow the instructions on the CentOS web site here, noting that for CentOS/Redhat 7 the path through the instructions is a little twisty:
http://wiki.centos.org/HowTos/Laptops/Wireless/Broadcom
And refer to the Release Notes on the Broadcom page here:
http://broadcom.com/support/802.11/linux_sta.php
Note that although the CentOS web page does not list the model BCM4352, that model is listed in Broadcom README file which is downloadable here.
Following the directions, first download the driver. This needs to be done via the GUI, since it requires clicking through a license agreement on the web pag. Start the GUI:
startx
Launch the browser and go to the web page.
In the driver section, select Linux® STA 64-bit driver, and download it to the ~/Downloads directory.
Then, work as root to copy the files.
su -
mkdir -p /usr/local/src/hybrid-wl
cd /usr/local/src/hybrid-wl
tar xvfz /home/michael/Downloads/hybrid-v35_64-nodebug-pcoem-6_30_223_271.tar.gz
chown -R michael /usr/local/src/hybrid-wl
exit
Build the driver. This will produce some errors and warning, as predicted by the CentOS instructions.
cd /usr/local/src/hybrid-wl
make -C /lib/modules/`uname -r`/build/ M=`pwd`
Download the two patches to the specified directory.
cd /usr/local/src

sudo wget -O wl-kmod-fix-ioctl-handling.patch "https://wiki.centos.org/HowTos/Laptops/Wireless/Broadcom?action=AttachFile&do=get&target=wl-kmod-fix-ioctl-handling.patch"

sudo wget -O wl-kmod-kernel_4.7_IEEE80211_BAND_to_NL80211_BAND.patch "https://wiki.centos.org/HowTos/Laptops/Wireless/Broadcom?action=AttachFile&do=get&target=wl-kmod-kernel_4.7_IEEE80211_BAND_to_NL80211_BAND.patch"
Apply the two patches:
cd /usr/local/src/hybrid-wl

patch -p1 < ../wl-kmod-fix-ioctl-handling.patch

patch -p1 < ../wl-kmod-kernel_4.7_IEEE80211_BAND_to_NL80211_BAND.patch
Apply additional edits and build:
sed -i 's/ >= KERNEL_VERSION(3, 11, 0)/ >= KERNEL_VERSION(3, 10, 0)/' src/wl/sys/wl_cfg80211_hybrid.c
sed -i 's/ >= KERNEL_VERSION(3, 15, 0)/ >= KERNEL_VERSION(3, 10, 0)/' src/wl/sys/wl_cfg80211_hybrid.c

sed -i 's/ < KERNEL_VERSION(3, 18, 0)/ < KERNEL_VERSION(3, 9, 0)/' src/wl/sys/wl_cfg80211_hybrid.c
sed -i 's/ >= KERNEL_VERSION(4, 0, 0)/ >= KERNEL_VERSION(3, 10, 0)/' src/wl/sys/wl_cfg80211_hybrid.c

sed -i 's/ < KERNEL_VERSION(4,2,0)/ < KERNEL_VERSION(3, 9, 0)/' src/wl/sys/wl_cfg80211_hybrid.c
sed -i 's/ >= KERNEL_VERSION(4, 7, 0)/ >= KERNEL_VERSION(3, 10, 0)/' src/wl/sys/wl_cfg80211_hybrid.c

make -C /lib/modules/`uname -r`/build/ M=`pwd`
The make command produces two warnings.
Strip out the debug info and copy the module.
strip --strip-debug wl.ko
sudo cp -vi /usr/local/src/hybrid-wl/wl.ko /lib/modules/`uname -r`/extra/
Add driver module to kernel.
cd /usr/local/src/hybrid-wl
sudo depmod $(uname -r)
sudo modprobe wl
Edit this file:
sudo vi /etc/modprobe.d/blacklist.conf
by appending this at the end:
# more per http://wiki.centos.org/HowTos/Laptops/Wireless/Broadcom
blacklist bcm43xx
blacklist b43
blacklist b43legacy
blacklist bcma
blacklist brcmsmac
blacklist ssb
blacklist ndiswrapper
Remove the existing/conflicting wireless driver modules, if any, from kernel.
su -
modprobe -r bcm43xx
modprobe -r b43
modprobe -r b43legacy
modprobe -r ssb
modprobe -r bcma
modprobe -r brcmsmac
modprobe -r ndiswrapper
Set up to load module at boot time.
vi /etc/sysconfig/modules/kmod-wl.modules

#!/bin/bash

for M in lib80211 cfg80211 wl; do
    modprobe $M &>/dev/null
done
Reboot to test:
reboot
Important note from CentOS web page:
[C7] Test WiFi with Graphical User Interface
I found it easier to test WiFi by using the graphical user interface (GUI). Log in as the administrative user ("michael" in my case), on the monitor and keyboard directly connected to new system. Type the following to start the GUI.
startx
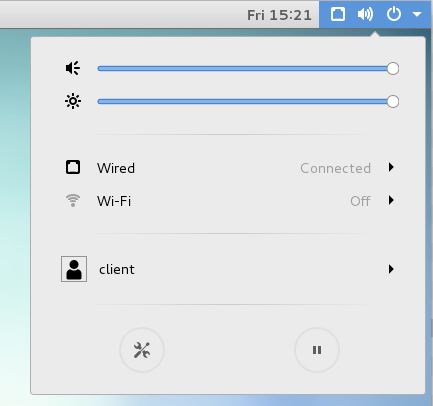
Click the network icon in the menu bar, towards the right.
Click the arrow to the right of Wi-Fi, and complete Wi-Fi setup.
[C7] Install Prime95 Stress-testing Tool
Download and unpack Prime95 (mprime) version 26.6. A post elsewhere says, "Do NOT use any Prime95 versions later than 26.6."
cd ~
mkdir mprime
cd mprime
wget http://www.mersenne.org/ftp_root/gimps/p95v285.linux64.tar.gz
tar zxvf p95v285.linux64.tar.gz
Documentation is at CPU Stress / Torture Testing. To start:
cd ~/mprime
./mprime
Use Control-C to stop.
Do not run without monitoring temperature. The Intel Temperature Guide on tomshardware.com is useful reading.
[C7] Install Linpack Testing Tool
Install the Linpack tool from Intel.
cd ~
mkdir linpack
cd linpack
wget http://registrationcenter-download.intel.com/akdlm/irc_nas/9752/l_mklb_p_2017.3.017.tgz
tar zxvf l_mklb_p_2017.3.017.tgz
To run Linpack:
cd l_mklb_p_2017.3.017/benchmarks_2017/linux/mkl/benchmarks/linpack
./runme_xeon64
Use Control-C to stop.
Do not run without monitoring temperature. The Intel Temperature Guide states, "Other stability tests such as Linpack and Intel Burn Test have cycles that load all registers with all one's, which is equivalent to a 110% workload, and are also unsuitable for CPU thermal testing."
[C7] VNC Server Installation and Setup
I followed some of the instructions on CentOS wiki at VNC (Virtual Network Computing), with additional instructions from the RedHat documentation here.
Adjust Linux firewall to allow access to ports used by VNCServer.
sudo firewall-cmd --permanent --new-service=vnc
sudo firewall-cmd --permanent --service=vnc --add-port=5901-5903/tcp
sudo firewall-cmd --permanent --service=vnc --add-port=6001-6003/tcp
sudo firewall-cmd --permanent --zone=public --add-service=vnc
sudo firewall-cmd --reload
Configure the VNC display for a single user:
sudo cp /usr/lib/systemd/system/vncserver@.service /etc/systemd/system/vncserver@.service
sudo vi /etc/systemd/system/vncserver@.service
Change <USER> in lines to client:
ExecStart=/usr/sbin/runuser -l client -c "/usr/bin/vncserver %i"
PIDFile=/home/client/.vnc/%H%i.pid
And then make the changes take effect:
sudo systemctl daemon-reload
Add a VNC password for the user
su - client
vncpasswd
exit
Start the VNC server:
sudo systemctl start vncserver@:1.service
To have the VNC server start automatically at boot:
sudo systemctl enable vncserver@:1.service
Use Chicken (derived from a previous app named "Chicken of the VNC") as a VNC client on the Mac. When opening a connection with Chicken, use Display number 1.
[C7] Beep Installation and Setup
Install the beep command.
cd ~/Downloads
wget http://www.johnath.com/beep/beep-1.3.tar.gz
Expand, make, and install:
tar xvfz beep-1.3.tar.gz
cd beep-1.3
make

sudo mkdir /usr/man
sudo make install
sudo chmod 4755 /usr/bin/beep
Could not open /dev/tty0 or /dev/vc/0 for writing
open: No such file or directory
Create a script that plays a tune:
vi startbeep.sh

#!/bin/sh
beep -D 50 -f 329.6 -l 300 -n -D 50 -f 349.2 -l 100 -n -D 50 -f 392.0 -l 200 -n -D 50 -f 523.2 -l 800
Make it executable.
chmod +x startbeep.sh
The rc.local file is no longer used to invoke a script at the end of boot. Follow the instructions from here to cause the startbeep script to play when the machine has completed startup.
sudo mkdir /etc/cron.reboot
sudo cp startbeep.sh /etc/cron.reboot
sudo vi /etc/cron.d/reboot

@reboot root run-parts  /etc/cron.reboot
[C7] Graphics Card Installation and Setup
CentOS 7 comes with a functioning radeon driver, and the AMD proprietary driver does not appear to be compatible with CentOS 7.
[C7] R Benchmark
R benchmarks are discussed here. I used R-benchmark-25.R, which is convenient and commonly-used.
cd ~/Downloads
wget http://r.research.att.com/benchmarks/R-benchmark-25.R
R
And then run in R:
source("~/Downloads/R-benchmark-25.R")
[C7] OpenBLAS
Download and build OpenBLAS with default options:
cd ~
mkdir OpenBLAS
cd OpenBLAS/
wget https://github.com/xianyi/OpenBLAS/archive/v0.2.19.zip
unzip v0.2.19
cd OpenBLAS-0.2.19
make
sudo mkdir /usr/lib64/openblas
sudo make PREFIX=/usr/lib64/openblas install
Switching
To prepare to use different versions of BLAS, rename the reference library and set up a symbolic link:
sudo mv /usr/lib64/R/lib/libRblas.so /usr/lib64/R/lib/libRblas.ref.so
sudo ln -sf /usr/lib64/R/lib/libRblas.ref.so /usr/lib64/R/lib/libRblas.so
We can now switch back and forth between the reference BLAS library and OpenBLAS:
# for OpenBLAS use
cd /usr/lib64/R/lib
sudo ln -sf /usr/lib64/openblas/lib/libopenblas.so libRblas.so

# for R reference BLAS use
cd /usr/lib64/R/lib
sudo ln -sf libRblas.ref.so libRblas.so
sudo yum install ntp) may not be necessary if ntp was installed from the CD.